Remember those rainy afternoons or lazy summer days when crafting was the best thing ever? The smell of crayons, the glitter, the pure joy of making something colorful? This Crayon Star Sun Catcher craft takes me right back there!
It’s incredibly easy, uses up those broken crayon bits lying around, and results in something truly beautiful that catches the sunlight and makes your windows sparkle. Plus, it’s a fantastic activity to do with kids (or just for yourself!).
Why You’ll Love Crayon Star Sun Catchers
- Fast: You can whip up a few in under an hour (plus cooling time!).
- Easy: Perfect for all ages, with minimal adult supervision needed for most steps.
- Giftable: Tie a ribbon on them and give them as sweet, handmade presents.
- Crowd-pleasing: Everyone loves seeing these vibrant stars hanging in the window!
Ingredients
Here’s what you’ll need to gather. Chances are, you have most of this hiding in a craft bin or junk drawer!
- Old crayons: Those broken, stubby ones are perfect! The more colors, the merrier.
- Wax paper: Standard kitchen wax paper works great.
- Parchment paper: You’ll need this to protect your iron and ironing surface.
- Manual sharpener or knife: For getting those tiny crayon shavings. An adult should handle the knife!
- Iron: A regular clothes iron is all you need.
- Star stencil or cookie cutter: Or any shape you like! Hearts, circles, maybe even animals?
- Baker’s twine: Or any string, ribbon, or yarn for hanging.
How to Make Crayon Star Sun Catchers
Ready to turn those old crayons into window art? Let’s get crafting!
First things first, you need those colorful bits! Carefully remove any paper from the old crayons. This can be a fun job for little helpers, but sometimes that paper is really stuck! A little soak in warm water can help loosen stubborn wrappers.
Next, it’s time to get those shavings. You can use a manual sharpener to sharpen the crayons into small shavings. This is also a great step for kids to do (with supervision!), watching the colors pile up. If you don’t have a sharpener, have an adult use a knife to carefully shave the crayons into bits over a safe surface. Safety first here!
Now, let’s make the crayon sandwich. Take a piece of wax paper approximately 12 x 12 inches (you can adjust the size depending on how many shavings you have) and place your crayon shavings onto it, spreading them out evenly. Don’t pile them too high, or they won’t melt smoothly. Think a single layer, maybe slightly overlapping.
Fold the wax paper in half over the crayon shavings, like closing a book. Then, double fold the edges to create an envelope. This seals the shavings inside so they don’t ooze out during melting. I usually make smaller envelopes, using only one crayon’s worth of shavings per envelope – this gives you more control over the color combos and keeps the melted layer thin.
Protect your surfaces! Place the wax paper envelope between two large pieces of folded parchment paper. This is crucial to prevent any crayon mishaps on your iron or ironing board. You don’t want melted wax on your favorite shirt-making tool!
Time for the magic! Turn on your iron to a low setting – definitely no steam! Gently press down on the parchment paper where the wax paper envelope is to melt the crayon shavings inside the wax paper. Move the iron in a circular motion for just a few seconds at a time. Peek carefully under the top parchment layer (without touching the wax paper) to see if the crayons are melting and spreading. You want them just melted, not bubbling or smoking.
Once the crayons are melted and combined into a thin, colorful sheet, carefully remove the parchment paper and wax paper. Be gentle, as it might still be a little warm. Let the melted crayon mixture cool completely. You can place it on a flat surface like a cookie sheet to cool faster.
After it has cooled and hardened, it’s cutting time! Use a star stencil or cookie cutter to trace and cut out star shapes from the melted crayon sheet. A cookie cutter works best if you press firmly. If using a stencil and knife, an adult should do the cutting. You can get quite a few shapes from one sheet!
Almost done! Punch a small hole in each star’s top point. A standard hole punch works well if your sheet isn’t too thick. If it’s a bit tricky, you can carefully use a push pin (adult job!).
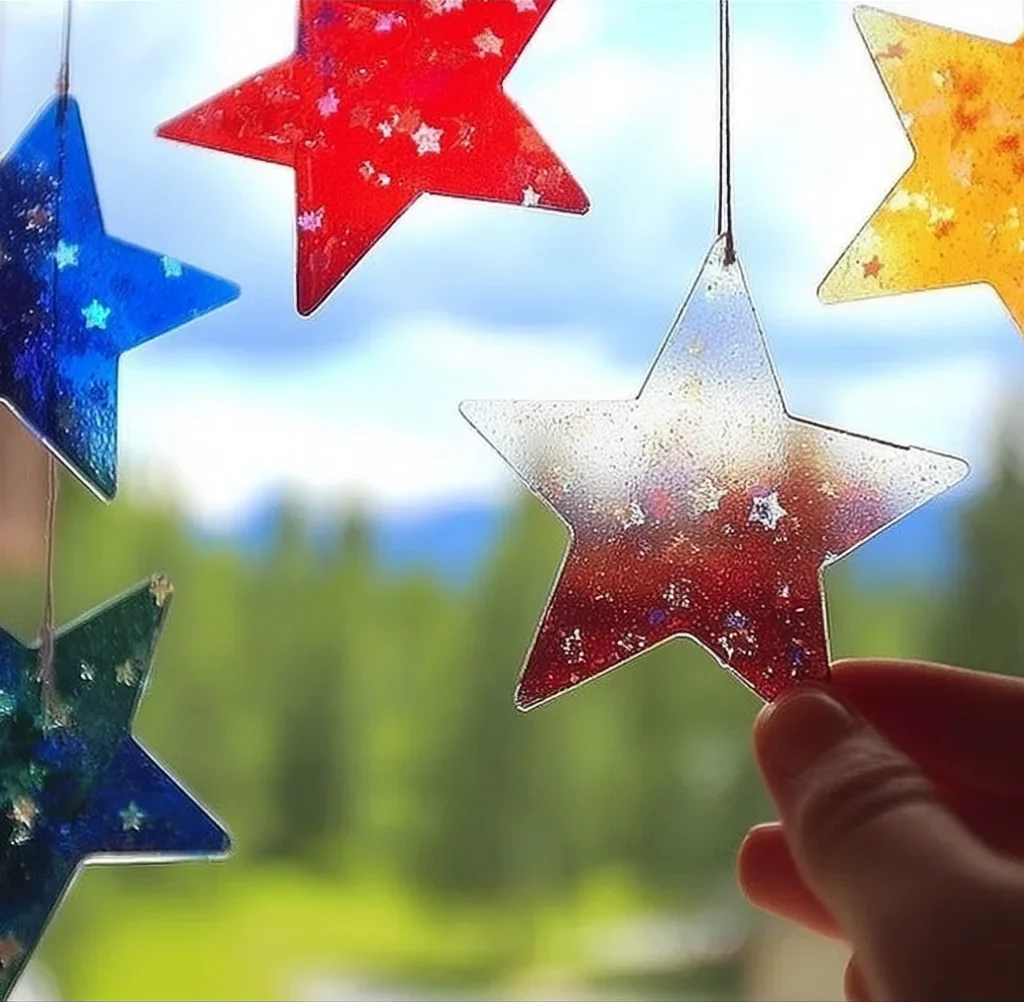
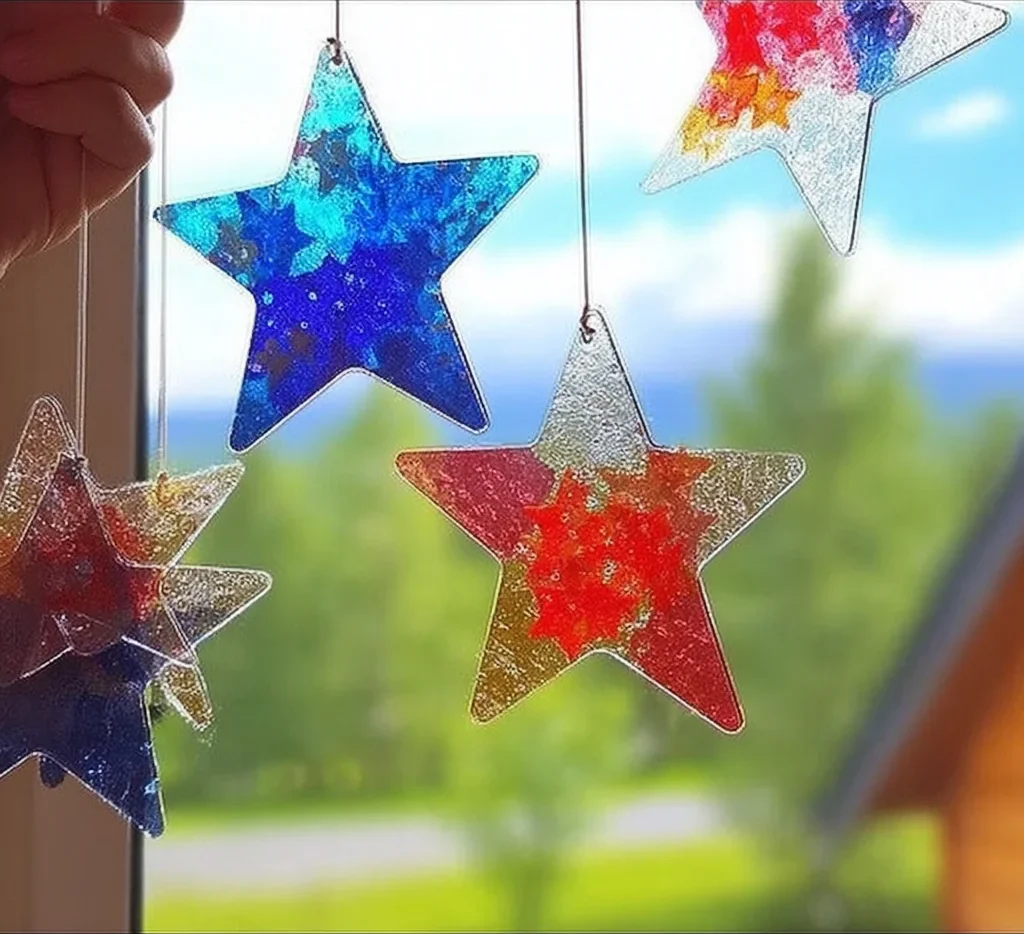
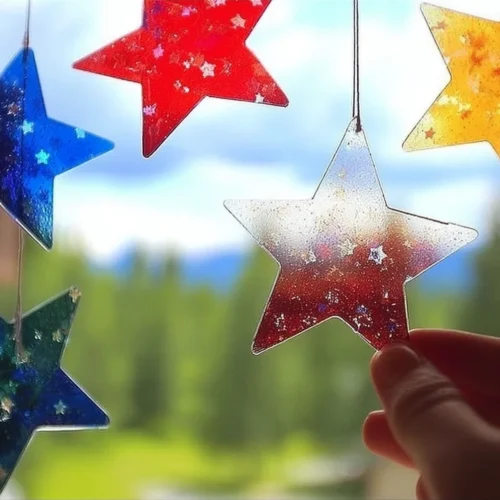
Finally, use baker’s twine to thread through the hole and hang the stars in a sunny window. Watch them transform as the light shines through! It’s truly mesmerizing. For another fun activity to do with the kids, why not try making Easy Kool-Aid Gummy Treats or even whip up a batch of Easy Chocolate Covered Strawberry Popcorn while the stars cool?
Substitutions & Additions
Want to get creative? Here are a few ways to mix things up:
- Different Shapes: Use cookie cutters for hearts, animals, circles, or any shape you like!
- Glitter Power: Add a sprinkle of fine glitter to the crayon shavings before melting for extra sparkle.
- Mixed Mediums: Try adding tiny bits of metallic crayons or even pieces of colored cellophane for different effects.
- Hanging Options: Instead of twine, use colorful ribbon, fishing line (for an invisible look), or even yarn.
- Beyond Sun Catchers: Cut larger shapes and use them as window decorations without hanging, or even as colorful inserts for homemade cards (though be mindful of melting in hot environments!).
Tips for Success
Keep these pointers in mind for the best results:
- Low Heat is Key: Always use the iron on the lowest setting with NO steam. Too high heat can burn the wax paper and make it difficult to peel off.
- Don’t Over-Melt: You just want the shavings to fuse into a solid sheet. Ironing for too long can make the colors muddy.
- Protect Everything: Double up on the parchment paper if you’re worried. Better safe than sorry when it comes to wax!
- Cool Completely: Don’t rush the cooling step. The wax needs to be fully hardened to cut cleanly.
- Cookie Cutter Trick: If using a metal cookie cutter, sometimes chilling it slightly in the freezer helps it cut through the wax more cleanly.
How to Store Crayon Star Sun Catchers
Once made, these sun catchers are really meant to be displayed! However, if you need to store them (maybe between seasons or before gifting), lay them flat between sheets of parchment paper in a box. Avoid stacking heavy items on top or storing them in a hot place, as they could melt or stick together.
FAQs
Got questions? Let’s tackle a few common ones:
Can kids do this craft themselves?
Kids can definitely help with removing wrappers, sharpening crayons (with supervision), spreading shavings, and choosing colors. An adult should handle the knife for shaving and the hot iron.
What kind of crayons work best?
Any old wax crayons will work! This is a fantastic way to use up broken bits. The more vibrant the colors, the brighter your sun catcher will be.
My wax paper is sticking! What happened?
This usually means the iron was too hot or you ironed for too long. Make sure your iron is on the lowest setting and you are only applying heat for short bursts until the wax is just melted.
What if I don’t have a star cookie cutter?
No problem! You can use other cookie cutters, or simply cut out shapes freehand with scissors after the wax has cooled. Circles or squares are easy to cut without a template. For another fun, easy craft that uses simple tools, check out how to make Easy Homemade Worry Stones!
Happy crafting! Hope your windows are filled with beautiful, colorful stars soon!
Follow us on Pinterest for more fun recipes and craft ideas!
Easy Crayon Star Sun Catchers
Equipment
- Manual sharpener or knife
- Iron
- Star stencil or cookie cutter
- Hole punch
Ingredients
- Old crayons broken, stubby ones are perfect; the more colors, the merrier
- Wax paper standard kitchen wax paper
- Parchment paper
- Baker’s twine or any string, ribbon, or yarn for hanging
Instructions
- Step 1: Carefully remove any paper from the old crayons. A little soak in warm water can help loosen stubborn wrappers.
- Step 2: Get crayon shavings. Use a manual sharpener or have an adult carefully use a knife to shave the crayons into small bits over a safe surface.
- Step 3: Make the crayon sandwich. Take a piece of wax paper (approx. 12x12 inches or smaller) and place your crayon shavings onto it, spreading them out evenly in a single layer.
- Step 4: Fold the wax paper in half over the shavings, then double fold the edges to create an envelope and seal the shavings inside.
- Step 5: Protect your surfaces. Place the wax paper envelope between two large pieces of folded parchment paper.
- Step 6: Melt the crayons. Turn your iron to a low setting (no steam). Gently press down on the parchment paper where the wax paper envelope is, moving the iron in a circular motion for just a few seconds at a time until the crayons melt and spread into a thin sheet. Peek carefully to check progress.
- Step 7: Cool completely. Carefully remove the parchment paper and wax paper. Let the melted crayon mixture cool and harden completely on a flat surface.
- Step 8: Cut shapes. Use a star stencil or cookie cutter to trace and cut out star shapes from the cooled melted crayon sheet. A cookie cutter pressed firmly works well. An adult should handle cutting with a knife if using a stencil.
- Step 9: Punch a hole. Punch a small hole in each star's top point using a standard hole punch or carefully use a push pin (adult job).
- Step 10: Hang the stars. Thread baker’s twine (or other string/ribbon) through the hole and hang the stars in a sunny window to catch the light.