
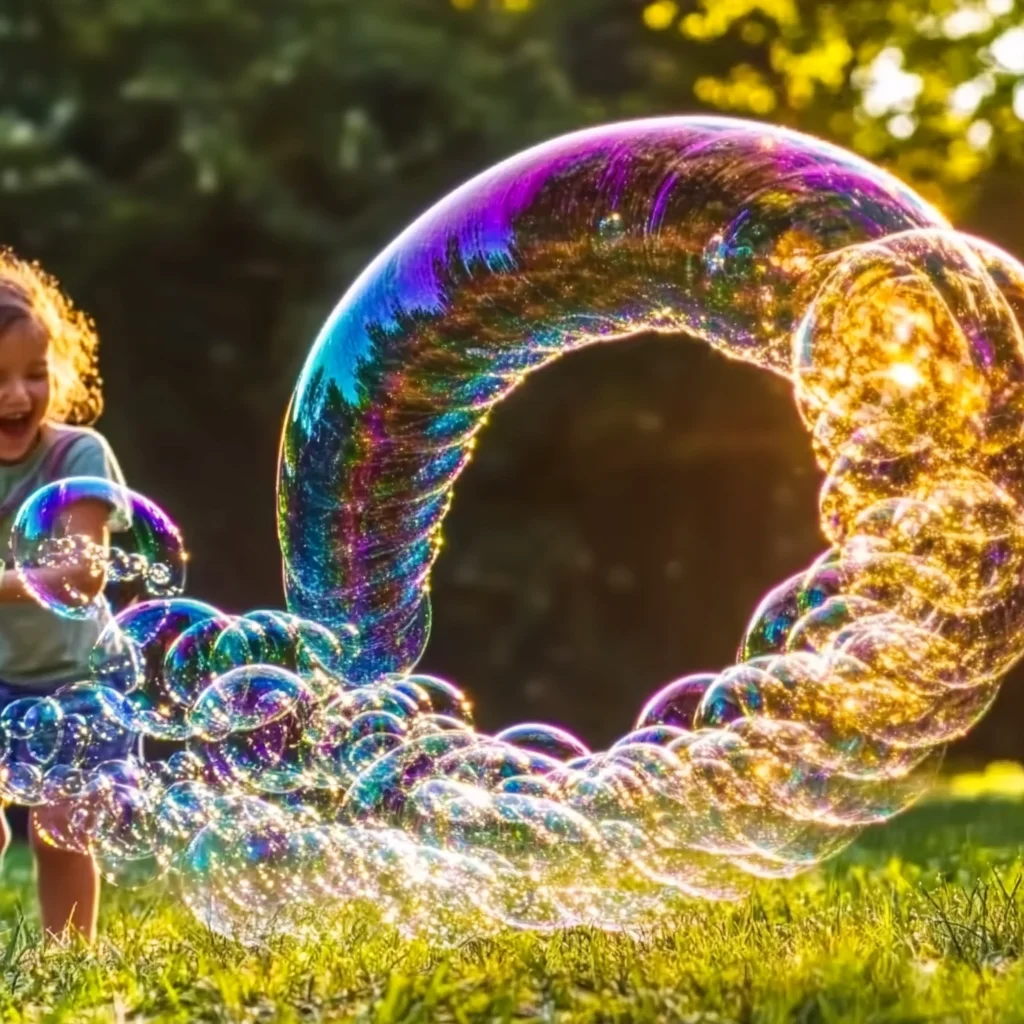
Remember those carefree summer days, running around the yard with a bottle of bubbles, trying to blow the biggest, bounciest ones you could? There’s something so magical about bubbles, isn’t there? They bring out the kid in all of us! Today, I want to share a super simple, incredibly fun DIY project that will let you create your own fantastic bubble snakes. Get ready to make some memories (and some seriously impressive bubbles)! This Bubble Snake Blower recipe is so easy, you’ll wonder why you never made one before.
Why You’ll Love Bubble Snake Blower
- Fast: You can whip this up in just a few minutes!
- Easy: Perfect for all ages, with simple steps anyone can follow.
- Giftable: Make a few and package them up as a unique party favor or small gift.
- Crowd-pleasing: Guaranteed to bring smiles and giggles to kids and adults alike. It’s a fantastic way to spend an afternoon, almost as fun as making Kool-Aid gummy treats!
Ingredients
Gathering your supplies is a breeze! Most of these things are probably already hanging out in your kitchen or craft bin:
- 1 empty plastic water bottle (16 – 20 oz) – Any size will work, but this is a good standard.
- 1 old sock or scrap of terry cloth – An old athletic sock is perfect, but any soft, absorbent fabric will do.
- 1 rubber band or duct tape – To secure your fabric snugly.
- 1 cup warm water – Warm water helps the soap and glycerin mix better.
- 2 Tbsp dish soap – Your regular dish soap works great!
- 1 Tbsp glycerin or light corn syrup – This is the secret ingredient for stronger, longer-lasting bubbles! You can find glycerin at most drugstores.
- Shallow tray or bowl – For holding your bubble solution.
- Scissors – To trim the bottle.
- Optional: food coloring – To make your bubble snakes colorful and extra magical!
How to Make Bubble Snake Blower
Alright, let’s get crafting! This is where the magic happens:
Step 1: Prepare Your Bottle
First things first, grab your empty plastic bottle. Using your scissors, carefully cut off the bottom 2 inches of the bottle. Don’t worry about making it perfectly neat, as long as it’s a clean cut. This opening will be where your bubble snakes emerge!
Step 2: Attach the Sock
Now, take your old sock (or terry cloth scrap) and stretch it over the open bottom of the bottle. Make sure it’s pulled taut and covers the opening completely. Use a rubber band or a piece of duct tape to secure the sock firmly in place around the bottle. This creates the “head” of your bubble snake blower!
Step 3: Mix Your Bubble Solution
In your shallow tray or bowl, pour in the warm water. Add the dish soap and the glycerin (or light corn syrup). Gently stir everything together until it’s well combined. Try not to create too many suds at this point – we want a nice, smooth solution.
Step 4: Get Ready to Blow!
Here comes the fun part! Submerge the sock-covered end of your bottle into the bubble solution. Make sure the fabric is nice and wet. Now, take a deep breath, put the mouthpiece of the bottle to your lips, and gently blow through it.
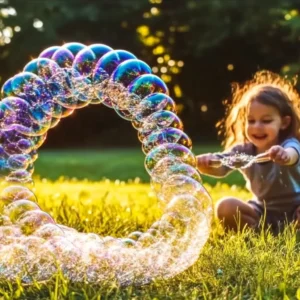
Voila! You should see a stream of colorful bubbles flowing out of the sock! It’s like a magic wand for bubble creation. For an extra touch of fun, you can add a drop or two of food coloring onto the sock before you dip it into the solution. This makes for some truly spectacular bubble snakes.
Substitutions & Additions
Feeling creative? You can totally customize your bubble snake blower experience!
- Different Fabrics: Experiment with different types of fabric scraps. Thicker materials might create different bubble textures.
- More Bubbles: If your bubbles aren’t as strong, try adding a tiny bit more glycerin or dish soap to your solution. It’s all about finding that perfect balance!
- Giant Bubbles: For even bigger bubbles, you could try using a slightly larger bottle or a wider opening on your sock.
- Fancy Solutions: Looking for other fun concoctions? You might enjoy experimenting with different DIY bubble recipes, like these DIY fun bouncing bubbles!
Tips for Success
A few little tricks can make your bubble-blowing even better:
- Gentle Blowing: Don’t blow too hard! A steady, gentle breath works best for creating those long, trailing bubble snakes.
- Don’t Over-soak: Just dip the sock end to get it wet; you don’t need to soak the whole bottle.
- Protect Surfaces: If you’re adding food coloring, it might stain, so it’s a good idea to do this activity on a surface that’s easy to wipe down or cover it with a protective cloth.
- Prep Ahead: You can mix up a larger batch of the bubble solution and store it in a sealed container if you plan on extended bubble blowing sessions.
How to Store Bubble Snake Blower
If you want to save your bubble snake blower for another day, it’s super simple. Just let the sock end air dry completely. You can then store the bottle and your bubble solution (in a sealed container) separately. The bubble solution is usually good for a few days to a week, but it’s always best to make a fresh batch for the most potent bubbles.
FAQs
- Q: Can I use any brand of dish soap?
A: Yes, most regular dish soaps will work. Some people find certain brands create better bubbles, but yours will likely be great with whatever you have on hand! - Q: What if I don’t have glycerin or corn syrup?
A: Glycerin or light corn syrup helps make the bubbles stronger and last longer. While you’ll still get bubbles without it, they might pop more easily. - Q: Is this safe for young children?
A: This is a wonderful activity for kids, but adult supervision is recommended, especially when using scissors and when blowing the bubbles to ensure they don’t ingest the solution.
So grab a bottle, a sock, and get ready for some bubbly fun! It’s amazing how simple ingredients can create so much joy. Happy bubble blowing!
For more fun DIY projects and kid-friendly crafts, be sure to follow us on Pinterest!
DIY Bubble Snake Blower
Equipment
- Empty plastic water bottle (16-20 oz)
- Old sock or scrap of terry cloth
- Rubber band or duct tape
- Shallow tray or bowl
- Scissors
Ingredients
- 1 cup warm water
- 2 Tbsp dish soap Your regular dish soap works great!
- 1 Tbsp glycerin or light corn syrup This is the secret ingredient for stronger, longer-lasting bubbles!
- Optional: food coloring To make your bubble snakes colorful and extra magical!
Instructions
- Step 1: Prepare Your Bottle
First things first, grab your empty plastic bottle. Using your scissors, carefully cut off the bottom 2 inches of the bottle. Don't worry about making it perfectly neat, as long as it's a clean cut. This opening will be where your bubble snakes emerge! - Step 2: Attach the Sock
Now, take your old sock (or terry cloth scrap) and stretch it over the open bottom of the bottle. Make sure it's pulled taut and covers the opening completely. Use a rubber band or a piece of duct tape to secure the sock firmly in place around the bottle. This creates the "head" of your bubble snake blower! - Step 3: Mix Your Bubble Solution
In your shallow tray or bowl, pour in the warm water. Add the dish soap and the glycerin (or light corn syrup). Gently stir everything together until it's well combined. Try not to create too many suds at this point – we want a nice, smooth solution. - Step 4: Get Ready to Blow!
Here comes the fun part! Submerge the sock-covered end of your bottle into the bubble solution. Make sure the fabric is nice and wet. Now, take a deep breath, put the mouthpiece of the bottle to your lips, and gently blow through it. - Voila! You should see a stream of colorful bubbles flowing out of the sock! It’s like a magic wand for bubble creation. For an extra touch of fun, you can add a drop or two of food coloring onto the sock before you dip it into the solution. This makes for some truly spectacular bubble snakes.
Notes
- Gentle Blowing: Don't blow too hard! A steady, gentle breath works best for creating those long, trailing bubble snakes.
- Don't Over-soak: Just dip the sock end to get it wet; you don't need to soak the whole bottle.
- Protect Surfaces: If you're adding food coloring, it might stain, so it's a good idea to do this activity on a surface that's easy to wipe down or cover it with a protective cloth.
- Prep Ahead: You can mix up a larger batch of the bubble solution and store it in a sealed container if you plan on extended bubble blowing sessions.