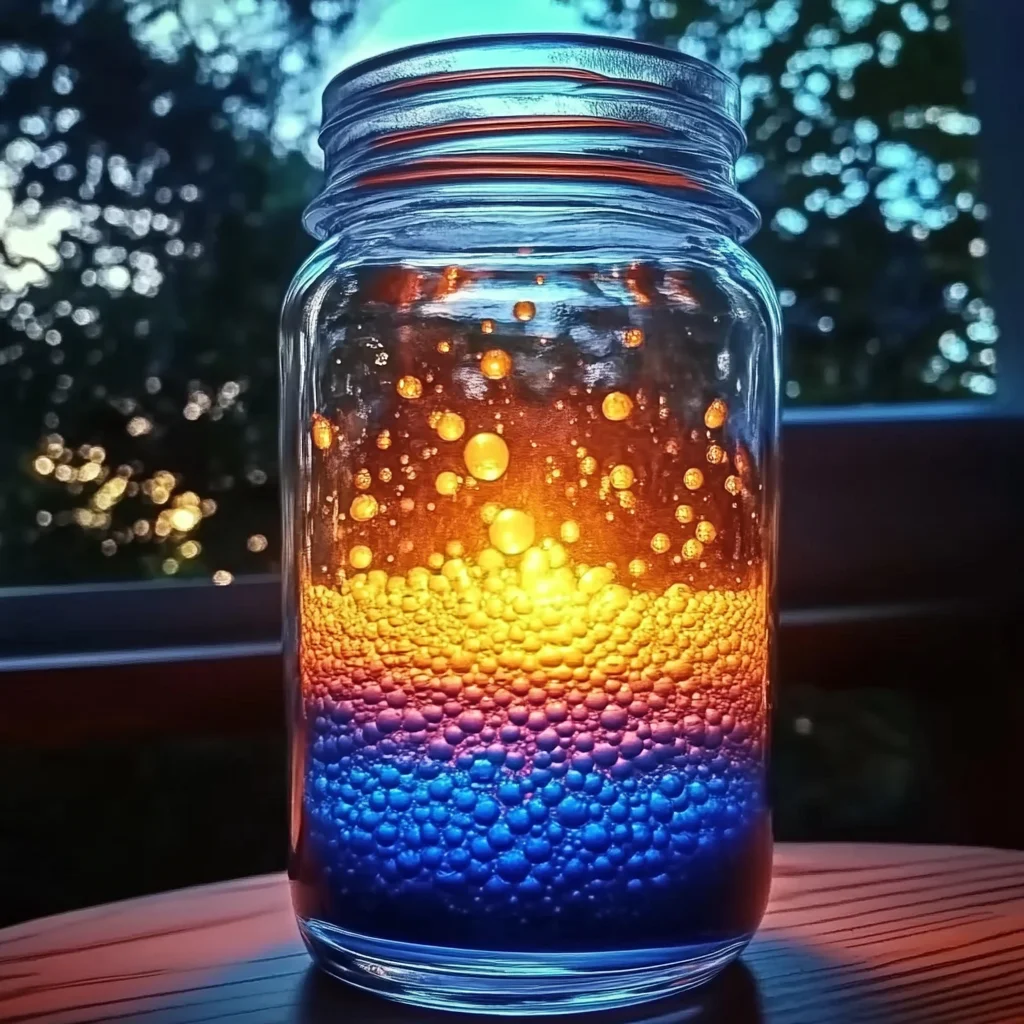
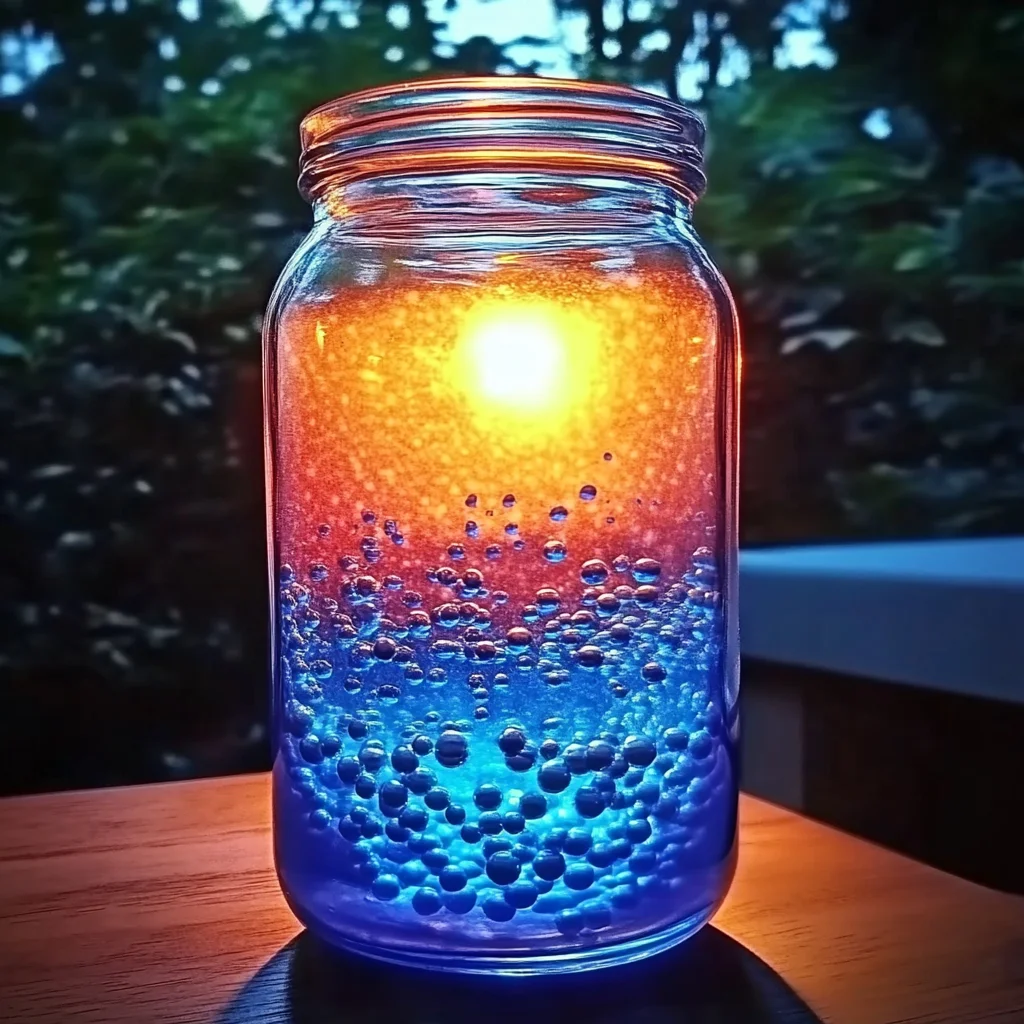
Remember those groovy lava lamps from the 70s? The ones that mesmerized you for hours with their colorful, undulating blobs? Well, get ready to recreate that magic right in your own kitchen! This DIY Lava Lamp project is not only incredibly fun and visually captivating, but it’s also surprisingly simple to make. It’s the perfect activity for a rainy afternoon, a science-themed party, or just a delightful way to add a touch of wonder to your day. I still remember the first time I made one – the excitement of watching those colors dance was pure joy!
Why You’ll Love DIY Lava Lamp
- Fast: You can have your lava lamp bubbling in minutes!
- Easy: Seriously, it’s as easy as pouring and dropping. No complicated steps here!
- Giftable: Imagine making these for friends or family – it’s a truly unique handmade gift.
- Crowd-pleasing: Kids and adults alike will be enchanted by the mesmerizing display.
Ingredients
Gathering your supplies is a breeze. You probably have most of these on hand already!
- Vegetable Oil: The star of our show, providing the base for the colorful blobs to travel through.
- Alka-Seltzer Original Tablets: These little fizzy wonders are the magic makers, creating the bubbling action.
- Food Coloring: Pick your favorite vibrant colors to make your lava lamp pop!
- Water: Just a bit of water to get the reaction going.
- A Clear Jar or Container: A tall, clear glass jar or even a plastic bottle works perfectly. The clearer, the better so you can see all the action!
How to Make DIY Lava Lamp
Alright, let’s get our hands a little messy (in the best way!) and create some mesmerizing movement. Follow these simple steps:
- Start with Water: Grab your clear jar. You’ll want to fill it about 1/8 of the way with room temperature water. Don’t overfill it just yet!
- Add the Oil: Now, carefully pour the vegetable oil into the jar. You want to fill it almost all the way to the top, leaving just a little bit of space. You’ll notice the oil and water don’t mix – that’s exactly what we want!
- Time for Color: Here’s where the fun really begins! Add a few drops of your chosen food coloring to the jar. Watch as the colorful droplets sink through the oil and mingle with the water at the bottom. It’s already looking cool, right?
- The Alka-Seltzer Magic: Now, take one Alka-Seltzer tablet and break it into about four pieces. Drop one quarter of the tablet into the jar. Prepare to be amazed!
- Keep the Show Going: As the Alka-Seltzer dissolves, it will create carbon dioxide gas, which attaches to the colored water and carries it up through the oil. When the gas escapes at the top, the colored water will sink back down, creating that classic lava lamp effect. To keep the bubbly fun going, just add another quarter of the Alka-Seltzer tablet whenever the action starts to slow down.
Substitutions & Additions
Feeling a bit adventurous? You can totally customize your DIY lava lamp! If you don’t have vegetable oil, baby oil also works wonderfully and is super clear. For added sparkle, try adding a pinch of glitter to the water before you add the oil – it creates a really magical, shimmering effect, kind of like our DIY glitter jar!
Tips for Success
- Room Temperature Water: Using room temperature water helps the reaction to start smoothly.
- Don’t Shake: Try your best not to shake the jar vigorously, as this can cause the oil and water to emulsify, making your lava lamp cloudy. If it does get a little cloudy, just let it sit for a while, and it should separate again.
- Experiment with Colors: Mix and match food coloring for unique shades! You could even try layering colors by adding them at different times.
- Reusing Your Lava Lamp: Once your Alka-Seltzer is gone, you can simply add more to restart the show.
How to Store DIY Lava Lamp
The beauty of this DIY lava lamp is that it’s reusable! When you’re done enjoying the mesmerizing bubbles, you can simply put a lid on your jar and save it for another day. Just remember to add fresh Alka-Seltzer tablets to get it going again. It should keep its visual appeal for quite some time, as long as the contents remain separated.
FAQs
- Q: Why isn’t my lava lamp bubbling?
A: Make sure you’re using Alka-Seltzer Original tablets, as other effervescent tablets might not produce the same effect. Also, ensure your water is room temperature and that you’ve added enough Alka-Seltzer. - Q: Can I use something other than vegetable oil?
A: Yes! Baby oil is a great alternative. Avoid oils that are too thick or colored, as they might not allow you to see the effect clearly. - Q: How long does the bubbling last?
A: The bubbling lasts as long as the Alka-Seltzer tablet is actively dissolving. You can extend the fun by adding more tablet pieces as needed.
This DIY lava lamp is a fantastic way to explore basic science principles while having a blast. It’s a project that sparks curiosity and brings a little bit of wonder into our everyday lives. If you enjoy hands-on activities and creative crafts, be sure to check out other fun projects on our site, like making glow-in-the-dark bubbles or creating beautiful crayon star sun catchers!
Loved this project? Come and follow us on Pinterest for more fun DIYs and delicious recipes!
DIY Lava Lamp
Equipment
- Clear Jar or Container
- Measuring Cup
Ingredients
For the DIY Lava Lamp
- 1/4 cup water room temperature
- 1 cup vegetable oil
- 5-10 drops food coloring your favorite vibrant colors
- 1 Alka-Seltzer Original tablet Alka-Seltzer Original tablet broken into four pieces
- pinch glitter glitter optional, for added sparkle
Instructions
- Step 1: Grab your clear jar. You'll want to fill it about 1/8 of the way with room temperature water. Don't overfill it just yet!
- Step 2: Now, carefully pour the vegetable oil into the jar. You want to fill it almost all the way to the top, leaving just a little bit of space. You'll notice the oil and water don't mix – that's exactly what we want!
- Step 3: Here’s where the fun really begins! Add a few drops of your chosen food coloring to the jar. Watch as the colorful droplets sink through the oil and mingle with the water at the bottom. It’s already looking cool, right?
- Step 4: Now, take one Alka-Seltzer tablet and break it into about four pieces. Drop one quarter of the tablet into the jar. Prepare to be amazed!
- Step 5: As the Alka-Seltzer dissolves, it will create carbon dioxide gas, which attaches to the colored water and carries it up through the oil. When the gas escapes at the top, the colored water will sink back down, creating that classic lava lamp effect. To keep the bubbly fun going, just add another quarter of the Alka-Seltzer tablet whenever the action starts to slow down.