
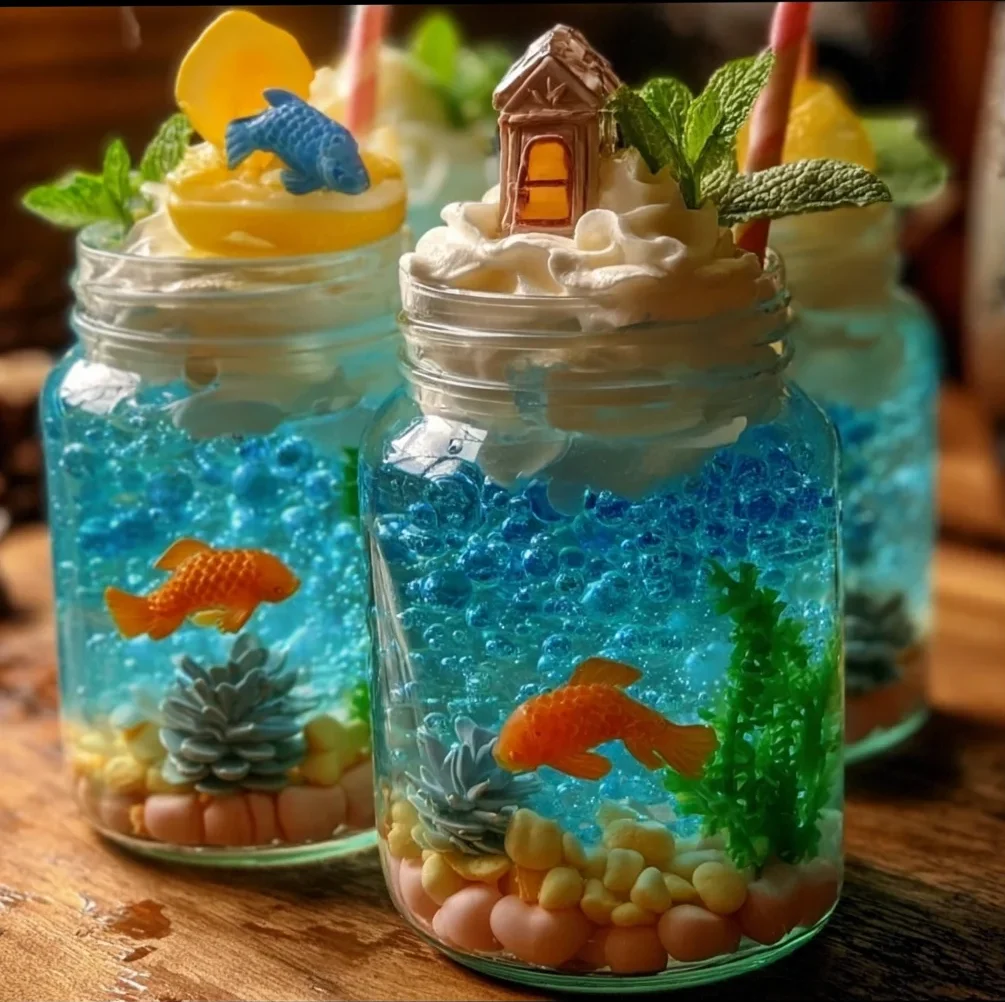
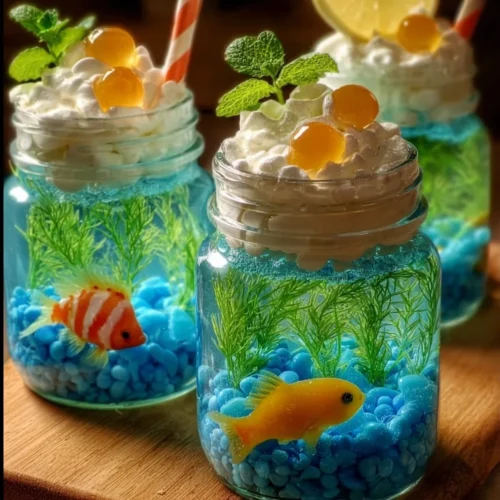
Hey there, kitchen adventurers! Remember being a kid and absolutely mesmerized by aquariums? The gentle sway of the plants, the colorful fish darting by… pure magic, right? Well, what if I told you you could capture a little bit of that underwater wonder and make it… edible? Yep! These Edible Aquarium Terrariums are not only adorable and ridiculously fun to make, but they taste pretty great too. They’re so easy, even the littlest helpers can get involved, and they come together in a flash, making them perfect for parties, playdates, or just a sweet afternoon treat.
Why You’ll Love Edible Aquarium Terrariums
- Fast – Most of the time is just waiting for the fridge to do its job!
- Easy – If you can boil water, you can make these!
- Giftable – Pop them in cute jars and they’re a sweet little present.
- Crowd-pleasing – Kids (and let’s be honest, adults!) go crazy for them.
Ingredients
Gather ’round! You only need a few simple things to bring your edible ocean to life:
- Blue Gelatin Mix: This is your ocean base! Any brand works. Pick a blue flavor you love, like Berry Blue or Island Pineapple.
- Gummy Fish or Sea Creatures: The stars of your aquarium! Grab a bag of gummy fish, or mix it up with gummy sharks, octopi, or whatever fun sea creatures you can find.
- Crushed Vanilla Cookies or Graham Crackers: This creates your sandy bottom. Vanilla wafers or classic graham crackers work perfectly. Just give them a good crush!
How to Make Edible Aquarium Terrariums
Alright, let’s get our hands a little sticky and make some edible art! You won’t believe how simple this is.
1. Make the Blue Ocean: First things first, you need to prepare your blue gelatin. Find those package instructions – they’ll tell you how much boiling water and cold water to use. It’s super important to make sure the gelatin powder is completely dissolved in the hot water before you add the cold water. Nobody wants grainy ocean water!
2. Pour it In: Now, carefully pour the prepared gelatin mixture into your clear containers. Small jars, clear cups, or even a clear baking dish work great. Just make sure they’re see-through so you can admire your creation later!
3. Let it Set Sail (in the Fridge): Pop those containers into the refrigerator. They’ll need a few hours to get nice and firm. Think about 4 hours, or until the gelatin is totally set and jiggly, not liquidy. This is the hardest part – waiting!
4. Add the Sand: Once your blue ‘water’ is firm, it’s time to add the sandy bottom. Take your crushed cookies or graham crackers and gently sprinkle an even layer over the top of the set gelatin. This is the seabed for your little swimmers.
5. Place Your Critters: Here’s the fun part! Gently place your gummy fish and sea creatures into the gelatin. You can push them down slightly so they look like they’re swimming in the water. Arrange them however you like – maybe some are on the sand, others are floating mid-water. Get creative! This is where you really bring your aquarium to life, much like adding fun candies to an easy rainbow crystal jelly cake!
6. Serve and Enjoy! That’s it! Your edible aquarium terrariums are ready to go. Spoon them out and watch the smiles appear.
Substitutions & Additions
Want to mix things up? Here are a few ideas:
- “Sand” Swaps: Instead of vanilla cookies, try crushed shortbread, Nilla Wafers, or even crushed pretzels for a sweet and salty twist (though that’s less “aquarium-like”).
- Ocean Decor: Add some candy pearls, edible glitter (the kind meant for food!), or even tiny candy rocks for extra detail.
- Different Gummies: Can’t find fish? Any gummy candies work! Just call it a “Mystery Pond” or “Critter Cove.” Or, if you’re feeling ambitious, why not try making your own using my recipe for Kool-Aid gummy treats?
- Layered Look: Pour just half the gelatin, let it set slightly, add some gummies, then add the rest of the gelatin to make some fish look like they’re deeper down.
Tips for Success
Keep these little pointers in mind for perfect edible aquariums every time:
- Dissolve Completely: Make sure that gelatin powder is totally dissolved in the hot water. Stir, stir, stir until you don’t see any granules at the bottom.
- Chill Power: Don’t rush the chilling! The gelatin needs to be completely set before you add the sand and fish, otherwise, they’ll just sink to the bottom.
- Gentle Placement: When adding the gummies and sand, be gentle so you don’t break up the set gelatin too much.
- Container Choice: Clear is key! Jars, glasses, or even small clear plastic cups work wonderfully and make it easy to see the fun layers. Thinking about fun drinks? These pair perfectly with something cool and blue, perhaps like an ocean blue colada frappuccino!
How to Store Edible Aquarium Terrariums
If you have any leftovers (which is doubtful, they disappear fast!), cover them tightly with plastic wrap or a lid and store them in the refrigerator. They should keep well for 2-3 days. The cookies might get a little soft over time, but the gelatin and gummies will be just fine.
FAQs
Got questions? I’ve got answers!
Can I make these sugar-free?
Absolutely! Just use sugar-free blue gelatin mix and sugar-free cookies or graham crackers.
Can I make them ahead of time?
Yes! You can make the gelatin layer a day or two in advance and keep it covered in the fridge. Add the sand and gummies just before serving for the best texture on the “sand” layer.
What kind of containers work best?
Any clear container! Small mason jars, clear plastic cups, wine glasses (for a fancy version!), or even a trifle dish for one big aquarium work great.
Why did my fish sink?
This usually happens if the gelatin wasn’t fully set when you added the fish. Make sure it’s completely firm before placing them in!
Hope you have a splashy good time making and eating these! They’re guaranteed to bring smiles.
Follow us on Pinterest for more easy and fun recipes!
Edible Aquarium Terrariums
Equipment
- Clear Containers (jars, cups, or baking dish)
- Large Pot
Ingredients
- Blue Gelatin Mix any brand, Berry Blue or Island Pineapple suggested
- Gummy Fish or Sea Creatures
- Crushed Vanilla Cookies or Graham Crackers
Instructions
- Step 1: Make the Blue Ocean: Prepare your blue gelatin according to package instructions, using boiling water and cold water. Ensure the gelatin powder is completely dissolved in the hot water before adding cold water.
- Step 2: Pour it In: Carefully pour the prepared gelatin mixture into your clear containers (small jars, clear cups, or a clear baking dish).
- Step 3: Let it Set Sail (in the Fridge): Refrigerate the containers for about 4 hours, or until the gelatin is totally set and firm.
- Step 4: Add the Sand: Once the gelatin is firm, gently sprinkle an even layer of crushed cookies or graham crackers over the top of the set gelatin to create the sandy bottom.
- Step 5: Place Your Critters: Gently place your gummy fish and sea creatures into the gelatin. You can push them down slightly to look like they are swimming in the water. Arrange them as desired.
- Step 6: Serve and Enjoy! Your edible aquarium terrariums are ready. Spoon them out to serve.