
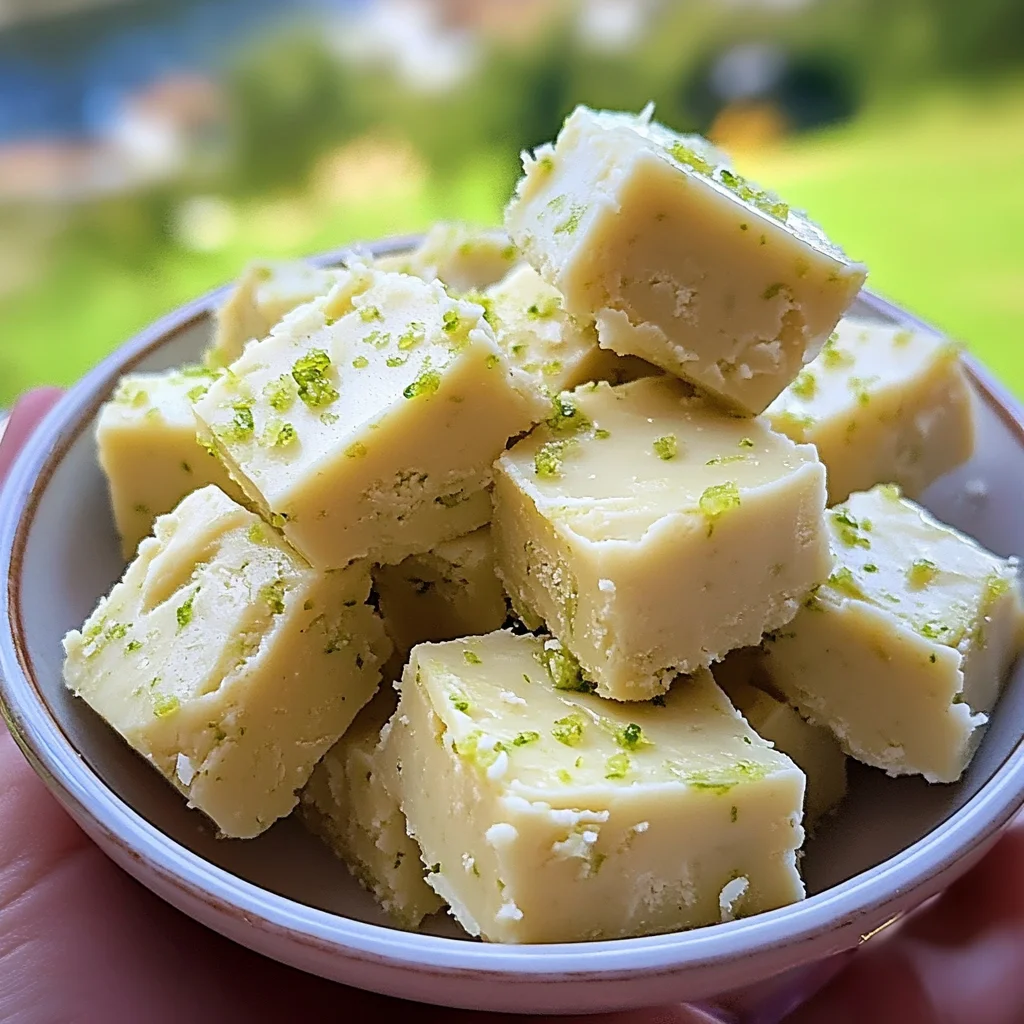
Oh, friends! Let me tell you about a little bite of sunshine that transports me straight to a warm, sandy beach, no matter the weather outside. It’s Key Lime Fudge! Growing up, there was always something magical about homemade fudge during holidays or special occasions. But sometimes, those classic recipes felt… well, a little intimidating, right? That’s why I fell head over heels for this Key Lime Fudge. It’s unbelievably easy, comes together in minutes, and tastes like a dream. It’s the kind of recipe you’ll keep in your back pocket for last-minute treats, thoughtful gifts, or just because you need a little burst of bright, tangy sweetness in your day.
Why You’ll Love This Recipe
- Fast: Seriously fast! From start to finish, you can whip up a batch in under 15 minutes on the stovetop. Cooling takes longer, but the active time is minimal.
- Easy: No candy thermometers needed! If you can stir a pot, you can make this fudge. It’s foolproof.
- Giftable: Wrap up squares in pretty boxes or bags, and you’ve got the most thoughtful, delicious homemade gift for friends, family, or neighbors.
- Crowd-pleasing: The vibrant key lime flavor is unique and refreshing, a perfect counterpoint to the sweet white chocolate. It’s always a hit!
Ingredients
Gathering your ingredients is the first step to fudge bliss! You don’t need much, and everything is pretty standard pantry fare, except maybe those tiny key limes!
- One 5-ounce can 2% evaporated milk: This is the magic ingredient that gives your fudge that creamy, rich texture. Don’t swap it for regular milk or sweetened condensed milk!
- 1⅔ cups granulated white sugar: Just your everyday sugar to provide the sweetness and structure.
- ½ teaspoon salt: A tiny pinch of salt helps balance the sweetness and really makes that lime flavor pop.
- 12 large marshmallows, quartered: These are another secret weapon for creaminess and help the fudge set up beautifully. Quartering them helps them melt faster!
- 2 cups white chocolate chips: Use good quality white chocolate chips here for the best flavor and smoothest melt.
- ¼ cup grated lime zest (about 5 limes): This is where all that intense, fragrant lime flavor comes from. Don’t skimp on the zest! Try to get only the green part, avoiding the bitter white pith.
- 2 tablespoons key lime juice (5 to 7 limes): Freshly squeezed is best! Key limes are smaller and tarter than regular limes, giving that distinct “key lime” taste. If you absolutely can’t find key limes, you can use regular lime juice, but the flavor will be slightly different.
How to Make It
Alright, let’s get cooking! This is the fun part, and it goes quickly, so have everything measured and ready before you start the heat.
- First things first, let’s get your pan ready. Grab an 8×8 inch baking pan. Line it with foil, leaving some overhang on the sides so you can easily lift the fudge out later. Then, give the foil a good greasing with butter or non-stick spray. This step is crucial for easy cutting later!
- Now, in a large, heavy-bottomed saucepan (this helps prevent scorching), combine the evaporated milk, granulated sugar, and salt. Place it over medium heat. You’ll need to stir pretty constantly as it heats up. Keep stirring until the mixture comes to a rolling boil.
- Once it’s boiling, reduce the heat slightly but keep it at a boil. You need to continue boiling it for 5 to 6 minutes. And yes, you absolutely MUST stir constantly during this time to prevent it from sticking to the bottom and burning. This boiling time is important for the fudge to set correctly! I like to use a heat-resistant spatula for this part.
- After the 5-6 minutes of boiling and stirring, remove the saucepan completely from the heat. Immediately stir in the quartered marshmallows, white chocolate chips, that beautiful key lime zest, and the key lime juice. Keep stirring until everything is completely melted and the mixture is smooth and glossy. It will transform from a sugary syrup into luscious fudge!
- Quickly pour the hot fudge mixture into your prepared pan. Use the back of a spoon or spatula to spread it evenly, or just tilt the pan gently to get it into the corners.
- Now comes the hardest part: waiting! Let the fudge cool completely at room temperature, or pop it in the fridge for a couple of hours to speed things up. Once it’s totally firm, lift the foil out of the pan, peel back the foil from the sides, and cut the fudge into 1-inch squares using a sharp knife. Cleaning the knife between cuts can help keep your squares neat!
Substitutions & Additions
This recipe is fantastic as is, but you can totally play around with it!
- Lime Juice: As mentioned, if you can’t find key limes, regular lime juice will work. The flavor profile will be a little less distinctively “key lime,” but still delicious.
- White Chocolate: You could potentially experiment with a different kind of chip, but white chocolate pairs so perfectly with the tart lime.
- Add Color: For that classic key lime look, you could stir in a drop or two of green food coloring along with the lime juice and zest.
- Crunch: Want some texture? Stir in about half a cup of chopped macadamia nuts or finely crushed graham crackers just before pouring the fudge into the pan.
Tips for Success
Making fudge is pretty straightforward, but here are a few things I’ve learned along the way to make sure your batch turns out perfectly every time:
- Read the Recipe First: Gather and measure all your ingredients before you even turn on the heat. Once the mixture starts boiling, things move fast!
- Stir, Stir, Stir: I can’t stress this enough during the boiling phase. Constant stirring prevents burning and helps the fudge reach the right consistency.
- Use a Heavy Pan: A heavier saucepan distributes heat more evenly and reduces the risk of scorching compared to a thin pan.
- Avoid Humidity: Fudge can be sensitive to moisture in the air. Try to make fudge on a dry day if possible!
- Cool Completely: Be patient! Cutting the fudge before it’s fully set will result in a sticky mess rather than clean squares.
- Prep Ahead: You can definitely make this fudge a day or two in advance of when you need it. Just store it properly!
How to Store It
Once your delicious Key Lime Fudge is cut into squares, you’ll want to store it properly to keep it fresh and tasty.
Store the fudge in an airtight container at room temperature. Layer the squares between sheets of wax paper or parchment paper to prevent them from sticking together. It will stay fresh for about 1-2 weeks. For longer storage, you can keep it in the refrigerator for 3-4 weeks, or even freeze it for several months (thaw in the fridge before serving).
FAQs
Got questions? Here are a few common ones about this delightful fudge!
Why didn’t my fudge set?
This is usually because the mixture didn’t boil long enough after coming to a boil (step 3) or wasn’t stirred constantly, preventing it from reaching the correct temperature/consistency. Make sure you boil for the full 5-6 minutes, stirring constantly!
Can I use bottled key lime juice?
Freshly squeezed key lime juice provides the best, brightest flavor. Bottled juice can work in a pinch, but it often lacks the vibrant tang and aroma of fresh.
Can I double this recipe?
While sometimes you can double fudge recipes, it can be tricky as it changes the cooking time and stirring dynamics significantly. For best results, I recommend making two separate batches if you need a larger quantity.
Do I have to use key limes?
The recipe is designed for key limes to give that specific tart-sweet flavor. You can substitute with regular lime juice and zest if necessary, but the flavor profile will be slightly different. It will still be good, just less “key lime-y.”

Easy & Creamy Homemade Key Lime Fudge
Equipment
- 8x8-inch baking pan
- Large heavy-bottomed saucepan
- Heat-resistant spatula or spoon
- sharp knife
- foil
Ingredients
- 1 can 2% evaporated milk 5-ounce
- 1.67 cups granulated white sugar 1⅔ cups
- 0.5 tsp salt
- 12 large marshmallows quartered
- 2 cups white chocolate chips good quality
- 0.25 cup grated lime zest about 5 limes, avoid white pith
- 2 tbsp key lime juice 5 to 7 limes, freshly squeezed (can substitute regular lime juice)
Instructions
- Step 1: Prep your pan. Grab an 8x8 inch baking pan. Line it with foil, leaving some overhang on the sides. Grease the foil with butter or non-stick spray.
- Step 2: In a large, heavy-bottomed saucepan, combine the evaporated milk, granulated sugar, and salt. Place over medium heat, stirring constantly until the mixture comes to a rolling boil.
- Step 3: Once boiling, reduce heat slightly but maintain a boil. Continue boiling for 5 to 6 minutes, stirring constantly to prevent sticking and burning. Use a heat-resistant spatula.
- Step 4: After 5-6 minutes of boiling, remove the saucepan completely from the heat. Immediately stir in the quartered marshmallows, white chocolate chips, key lime zest, and key lime juice. Keep stirring until everything is completely melted and the mixture is smooth and glossy.
- Step 5: Quickly pour the hot fudge mixture into your prepared pan. Spread it evenly using the back of a spoon or spatula, or tilt the pan gently.
- Step 6: Let the fudge cool completely at room temperature, or refrigerate for a couple of hours until totally firm. Lift the foil out of the pan, peel back the foil, and cut the fudge into 1-inch squares using a sharp knife. Clean the knife between cuts for neat squares.