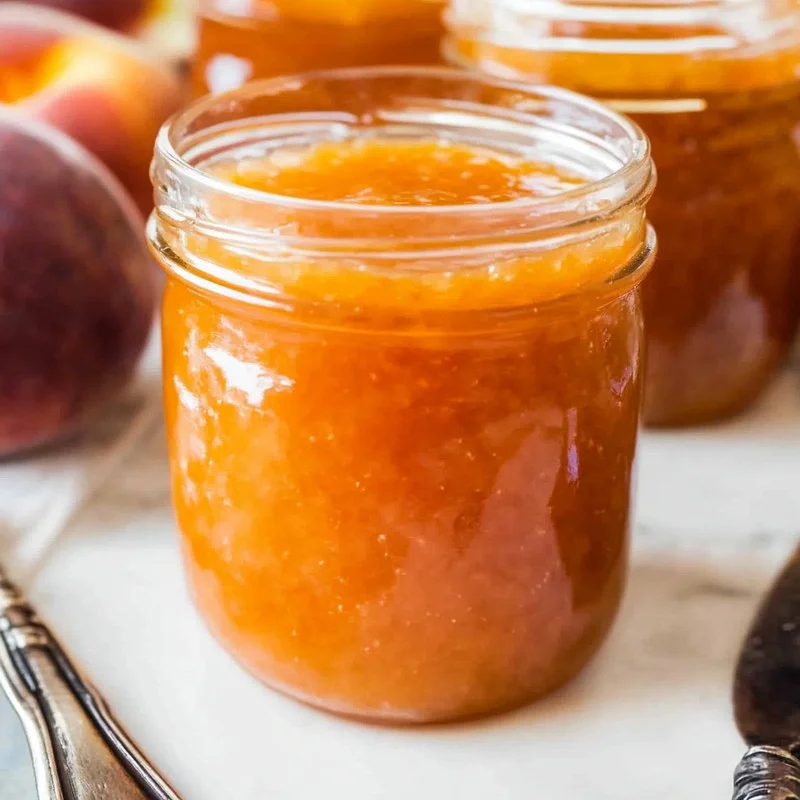
Oh, those lazy summer days! Do you remember the sweet, juicy peaches that seemed to burst with flavor right off the tree? There’s something incredibly nostalgic about that taste, isn’t there? Well, today we’re going to capture that magic and bottle it up with this super simple, no-pectin peach jam recipe. It’s so easy, you’ll be making jars of sunshine all season long!
Why You’ll Love Peach Jam (No Pectin)
- Fast: Seriously, this comes together much quicker than you might think.
- Easy: No fancy techniques or ingredients needed.
- Giftable: Imagine giving a jar of homemade goodness to friends and family! It’s the perfect thoughtful present.
- Crowd-pleasing: Who doesn’t love a good jam? It’s a classic for a reason.
Ingredients
Gathering your ingredients is the first step to jam-making bliss! Here’s what you’ll need:
- 1 ½ pounds peaches: Ripe, juicy peaches are key here. You want them soft and sweet.
- 1 cup granulated sugar: This is your sweetener and helps with preservation. Feel free to adjust a bit to your taste preference.
- 1 Tablespoon fresh lemon juice: This little bit of acidity brightens the peach flavor and helps the jam set up nicely.
How to Make Peach Jam (No Pectin)
Alright, let’s get our hands a little peachy! This process is so straightforward, you’ll wonder why you haven’t made it before.
- Prep those Peaches: First things first, let’s get those peaches ready. You’ll want to peel, pit, and then finely dice them. My favorite trick for easy peeling is a quick blanch! Just pop the peaches into boiling water for about 60 seconds, then immediately plunge them into a bowl of ice water. Let them chill for a minute or two, and the skins should slide right off. Score the skin around the bottom if it’s being stubborn.
- Get Mixing: Grab a nice, big saucepan. Into it, toss your diced peaches, the sugar, and that tablespoon of lemon juice. If you like your jam a little smoother, you can mash the peaches a bit with a potato masher right in the pot. It adds a lovely rustic texture!
- Heat it Up: Place your saucepan over medium heat. Stir everything gently until the sugar is completely dissolved. You’ll know it’s ready to move to the next step when the mixture starts to bubble.
- Simmer Down: Now, reduce the heat to medium-low. Keep stirring pretty frequently to make sure nothing sticks to the bottom. You’re going to let this simmer for about 15 minutes. You’re looking for the jam to thicken up and reach a temperature between 210-220℉ (99-104℃). If you don’t have a thermometer, you can do the “plate test”: put a small plate in the freezer before you start. When you think it’s ready, spoon a tiny bit of jam onto the cold plate, wait a few seconds, and then gently push it with your finger. If the surface wrinkles slightly, it’s done! Remember, it will thicken even more as it cools.
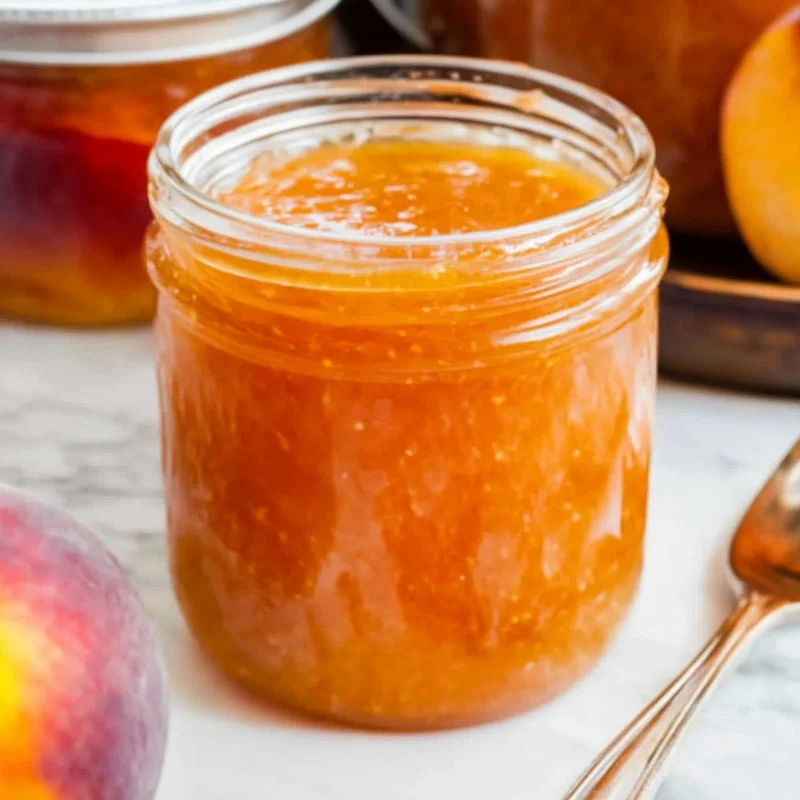
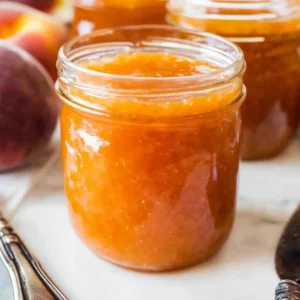
- Jar it Up: Carefully take your lovely, hot jam and transfer it into clean jars. Let them cool down completely on the counter before you pop on the lids. This is important for a good seal.
Substitutions & Additions
While this recipe is perfectly delicious as is, you can totally get creative!
- Spice it Up: A pinch of cinnamon or a tiny dash of nutmeg can add a warm, cozy note.
- Berry Goodness: Want to mix things up? Try adding some fresh blueberries or raspberries along with the peaches for a delightful mixed-fruit jam. If you’re feeling adventurous, you might enjoy our blueberry jalapeño jam for a sweet and spicy kick!
- Herbal Notes: A sprig of fresh mint or basil simmered with the peaches can add a surprising and refreshing twist.
Tips for Success
A few little pointers to make your jam-making journey even smoother:
- Use Ripe Peaches: The riper the fruit, the more natural sweetness and pectin you’ll have, which helps with thickening.
- Don’t Overcook: While you want it to thicken, overcooking can lead to a tough or burnt jam. Keep an eye on it, especially during the last few minutes.
- Sterilize Your Jars: For longer storage, make sure your jars and lids are clean and sterilized. You can do this by boiling them in water for about 10 minutes.
- Prep Ahead: You can peel and dice your peaches a day in advance and store them in the refrigerator in a container with a little lemon juice to prevent browning.
How to Store Peach Jam (No Pectin)
Once your beautiful jam has cooled, you have a few options for storing it.
- Refrigerator: If you plan to eat it within 3 weeks, simply pop the lidded jars into the refrigerator. It’s perfect for spreading on toast or mixing into yogurt.
- Freezer: For longer storage, freeze your jam! This is a great way to enjoy the taste of summer all year round. Make sure to leave a little headspace in the jars as the jam will expand when frozen.
FAQs
Got questions? We’ve got answers!
- Q: My jam seems too thin, what did I do wrong?
A: Don’t worry! Jam thickens considerably as it cools. If it’s still too thin after cooling completely, you can gently reheat it and simmer for a few more minutes, keeping the plate test in mind. - Q: Can I use frozen peaches?
A: Yes, you can! Thaw them completely first and drain off any excess liquid before proceeding with the recipe. - Q: How long does homemade jam last?
A: Properly stored in the refrigerator, it should last about 3 weeks. In the freezer, it can last for several months.
Making your own peach jam is such a rewarding experience. It’s a taste of sunshine that you can enjoy anytime. And speaking of delicious homemade treats, you might want to check out our easy grilled peach sundae recipe for another way to enjoy fresh peaches!
Want more delicious recipes and kitchen inspiration? Follow us on Pinterest!
Easy No-Pectin Peach Jam
Equipment
- Large saucepan
- Potato Masher (optional)
- Small Plate
- Jars
- Tongs
Ingredients
- 1 ½ pounds peaches Ripe, juicy peaches are key here. You want them soft and sweet.
- 1 cup granulated sugar This is your sweetener and helps with preservation. Feel free to adjust a bit to your taste preference.
- 1 Tablespoon fresh lemon juice This little bit of acidity brightens the peach flavor and helps the jam set up nicely.
Instructions
- Step 1: Prep those Peaches: First things first, let’s get those peaches ready. You’ll want to peel, pit, and then finely dice them. My favorite trick for easy peeling is a quick blanch! Just pop the peaches into boiling water for about 60 seconds, then immediately plunge them into a bowl of ice water. Let them chill for a minute or two, and the skins should slide right off. Score the skin around the bottom if it’s being stubborn.
- Step 2: Get Mixing: Grab a nice, big saucepan. Into it, toss your diced peaches, the sugar, and that tablespoon of lemon juice. If you like your jam a little smoother, you can mash the peaches a bit with a potato masher right in the pot. It adds a lovely rustic texture!
- Step 3: Heat it Up: Place your saucepan over medium heat. Stir everything gently until the sugar is completely dissolved. You’ll know it’s ready to move to the next step when the mixture starts to bubble.
- Step 4: Simmer Down: Now, reduce the heat to medium-low. Keep stirring pretty frequently to make sure nothing sticks to the bottom. You’re going to let this simmer for about 15 minutes. You’re looking for the jam to thicken up and reach a temperature between 210-220℉ (99-104℃). If you don’t have a thermometer, you can do the “plate test”: put a small plate in the freezer before you start. When you think it’s ready, spoon a tiny bit of jam onto the cold plate, wait a few seconds, and then gently push it with your finger. If the surface wrinkles slightly, it’s done! Remember, it will thicken even more as it cools.
- Step 5: Jar it Up: Carefully take your lovely, hot jam and transfer it into clean jars. Let them cool down completely on the counter before you pop on the lids. This is important for a good seal.