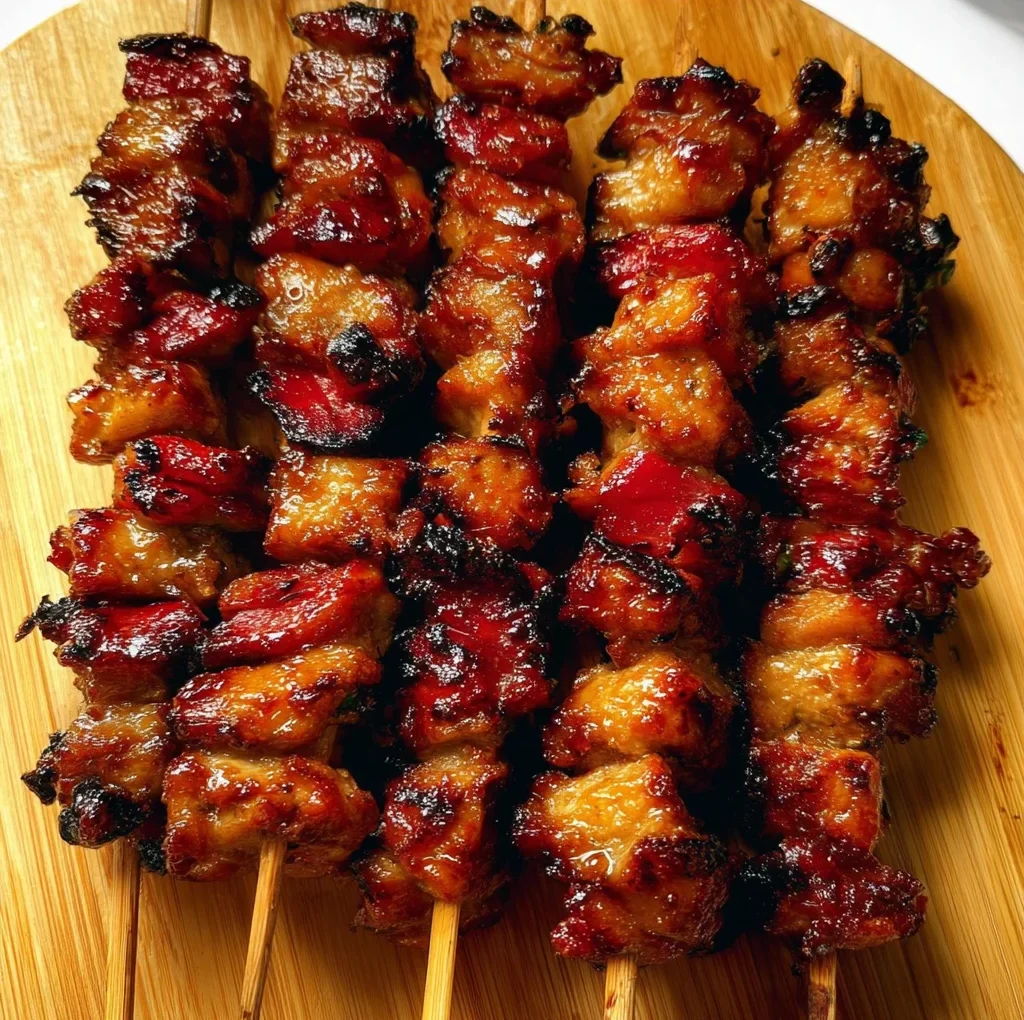
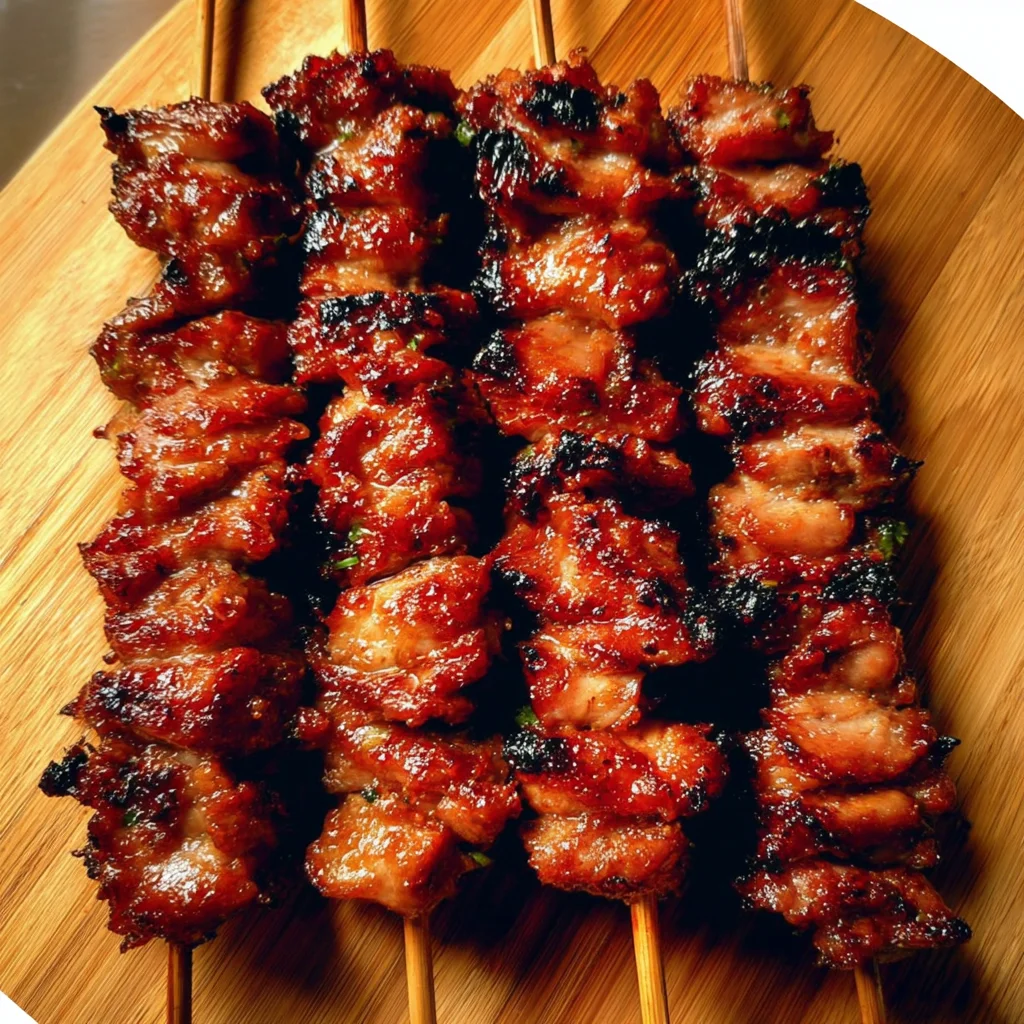
Picture this: a warm summer evening, the grill is sizzling, and the air smells like sweet coconut and savory spices. That’s the magic of these Grilled Thai Coconut Chicken Skewers! This recipe takes me right back to family cookouts and simple, delicious meals enjoyed outdoors. They’re so incredibly easy to whip up, packed with flavor, and honestly, disappear faster than you can make them. Whether you’re hosting a backyard bash or just looking for a simple weeknight dinner that feels special, these skewers are your new best friend.
Why You’ll Love This Recipe
- Fast
- Easy
- Giftable (Think marinated chicken kits!)
- Crowd-pleasing
- Serious flavor punch
Ingredients
Here’s what you’ll need to make this taste of Thailand happen in your own kitchen (or backyard!).
For the Chicken and Marinade:
- 1 kg boneless chicken thighs or drumsticks: Thighs are my go-to for grilling because they stay moist and flavorful. Drumsticks work great too! Cut them into roughly 2.5 cm (about 1 inch) pieces.
- 4-5 slices fresh ginger: That warm, spicy kick! Finely chop it up.
- 2 cloves garlic: The essential aromatic base. Also finely chopped.
- 2 tablespoons light soy sauce: For saltiness and depth.
- 1 tablespoon dark soy sauce: This gives a beautiful color and a slightly sweeter, richer flavor.
- 2 tablespoons coconut cream: Adds richness and that lovely coconut essence to the marinade.
- 2 tablespoons granulated sugar: Balances the savory flavors and helps with caramelization.
- 1 tablespoon oyster sauce: A little umami boost that ties everything together.
For the Coconut Cream Glaze:
- 6 tablespoons coconut cream: Creates a sticky, sweet glaze.
- 1.5 tablespoons honey: For sweetness and that gorgeous shine when grilled.
- 1 teaspoon light soy sauce: A touch of salt to balance the sweet glaze.
For the Simple Peanut Sauce (Optional but highly recommended!):
- 2 tablespoons coconut cream: Helps make the sauce creamy.
- 60 ml natural unsweetened peanut butter: The star of the show! Use a smooth one for easy mixing.
- 1 teaspoon rice vinegar: Adds a touch of necessary acidity.
- 1 teaspoon Thai red curry paste: For that classic Thai warmth and spice. Adjust to your heat preference!
- 2 teaspoons maple syrup or honey: Sweetness to balance the spice and peanut butter.
- 2 teaspoons light soy sauce: Adds saltiness and umami.
- 2-3 tablespoons water, as needed: To thin the sauce to your desired dipping consistency.
- 1 teaspoon sesame oil (optional): Adds a lovely nutty aroma.
- 1 teaspoon chili oil (optional): For extra heat if you like it spicy!
- Crushed roasted peanuts, for garnish (optional): For texture and extra peanut flavor!
How to Make It
Let’s get cooking! These skewers are pretty straightforward, so don’t be intimidated. Just follow along.
- Start with the Peanut Sauce (if you’re making it): Grab a small bowl. Whisk together the coconut cream, peanut butter, rice vinegar, red curry paste, maple syrup (or honey), and light soy sauce. Start with 2 tablespoons of water and mix well. If it’s too thick for dipping, add the third tablespoon of water. Give it a good stir until it’s super smooth and creamy. If you’re using sesame oil or chili oil, stir them in now. Set this aside – it’s the perfect dipping partner! You can even make this a day ahead.
- Prep the Skewers: If you’re using wooden skewers (which I usually do!), make sure to soak them in water for at least 30 minutes while you prep everything else. This prevents them from catching fire on the grill. Now, cut your chicken into nice, even 2.5 cm cubes. Pop them into a large mixing bowl. Get your ginger and garlic super finely chopped – the smaller the better so their flavor really gets into the chicken. Add the chopped ginger and garlic to the bowl with the chicken.
- Marinate the Chicken: Pour the light soy sauce, dark soy sauce, coconut cream, sugar, and oyster sauce into the bowl with the chicken, ginger, and garlic. Now, get in there with your hands (or use tongs!) and mix everything really, really well. You want every single piece of chicken to be coated in that glorious marinade. Cover the bowl tightly with plastic wrap or transfer it to a zip-top bag. Pop it in the fridge. Let it hang out there for at least 1-2 hours to soak up all those flavors. If you have the time, marinating overnight is even better for maximum deliciousness!
- Make the Glaze: In a small bowl, combine the coconut cream, honey, and light soy sauce for the glaze. Give it a little whisk. Set this aside – you’ll use it towards the end of grilling.
- Skewer Up!: About 30 minutes before you plan to grill, take the chicken out of the fridge. This helps it cook more evenly. Now, thread the marinated chicken pieces onto your soaked skewers. Try not to pack them too tightly, but make sure they’re secure with minimal loose ends.
- Grill Time!: Preheat your grill (charcoal or gas) to a medium-high heat, around 260°C (about 500°F). Once it’s hot, carefully place the skewers over direct heat. Grill them for a total of about 15-18 minutes. Make sure to turn them every 2-3 minutes so they brown nicely on all sides and cook through evenly. You’re looking for gorgeous grill marks and the chicken to be cooked all the way through, no longer pink inside.
- Glaze ‘Em!: This is where the magic happens! Once the chicken is cooked through, grab your coconut cream glaze. Brush it generously over the skewers while they’re still on the grill. Flip the skewers every minute or so, brushing again, repeating this 2-3 times. The glaze will caramelize slightly, making the skewers wonderfully sticky and even more flavorful.
- Serve & Enjoy!: Carefully remove the hot skewers from the grill and arrange them on a serving platter. Serve them immediately with that delicious Simple Peanut Sauce on the side for dipping!
Substitutions & Additions
Want to shake things up? Here are a few ideas:
- Chicken: You could try boneless, skinless chicken breasts, but they can dry out more easily on the grill. Cut them into similar-sized pieces and keep a close eye on them. Shrimp would also be amazing, just reduce the cooking time significantly (only a few minutes per side).
- Spice Level: Add a pinch of red pepper flakes to the marinade if you like more heat. For the peanut sauce, increase the red curry paste or add a splash of sriracha.
- Veggies: Thread some bell pepper chunks, onion pieces, or even pineapple chunks onto the skewers with the chicken for extra flavor and color!
- Vegetarian: Firm tofu or tempeh would work well! Press tofu thoroughly before marinating and grilling.
- Nut-Free: Skip the peanut sauce entirely or try a sunflower seed butter based sauce as an alternative if allergies are a concern.
Tips for Success
A few pointers to make sure your skewers turn out perfectly:
- Don’t Skip the Soaking: If using wooden skewers, really do soak them! It prevents them from burning up on the grill and making your skewers fall apart.
- Cut Even Pieces: Try to cut your chicken into pieces that are roughly the same size. This ensures they all cook at the same rate.
- Don’t Overcrowd: Don’t pack the skewers too tightly or put too many on the grill at once. You want space around them for even cooking and browning.
- Hot Grill is Key: Make sure your grill is properly preheated. A hot grill gives you those lovely char marks and cooks the chicken quickly, keeping it juicy.
- Rest Before Glazing: While the recipe says glaze immediately, sometimes I like to take the chicken just off the direct heat for a minute before glazing to prevent burning the glaze, then put them back over lower heat or indirect heat to finish with the glaze.
- Prep Ahead: The chicken can be marinated up to 24 hours in advance. The peanut sauce can also be made a day or two ahead of time and stored in the fridge.
How to Store It
Got leftovers? Lucky you! These skewers store pretty well.
Let the cooked skewers cool completely. You can store them on the skewers or slide the chicken off into an airtight container. Keep them in the refrigerator for up to 3-4 days. Reheat gently in a pan, in the oven, or even the microwave. The peanut sauce should also be stored in an airtight container in the fridge and is good for about a week.
FAQs
Here are a couple of common questions I get about these skewers:
Q: Can I make these in the oven?
A: Absolutely! Preheat your oven to about 200°C (400°F). Place the skewers on a foil-lined baking sheet fitted with a wire rack. Bake for 15-20 minutes, flipping halfway, until cooked through. You can brush on the glaze during the last 5-7 minutes of baking.
Q: What should I serve with these skewers?
A: So many options! Steamed rice, coconut rice, a simple green salad, grilled vegetables (like bell peppers or zucchini), or even some cool cucumber slices make great sides.
Q: Is coconut cream the same as coconut milk?
A: Coconut cream is thicker and richer than coconut milk, with a higher fat content. It’s usually found in a can, often near the coconut milk. Using coconut milk would result in a thinner marinade and glaze, but you could make it work in a pinch!
Easy Grilled Thai Coconut Chicken Skewers
Equipment
- Large mixing bowl
- Small bowl
- Grill
- Skewers
- Tongs
Ingredients
For the Chicken and Marinade
- 1 kg boneless chicken thighs or drumsticks cut into roughly 2.5 cm (about 1 inch) pieces
- 4-5 slices fresh ginger Finely chop it up
- 2 cloves garlic Also finely chopped
- 2 tablespoons light soy sauce
- 1 tablespoon dark soy sauce
- 2 tablespoons coconut cream
- 2 tablespoons granulated sugar
- 1 tablespoon oyster sauce
For the Coconut Cream Glaze
- 6 tablespoons coconut cream
- 1.5 tablespoons honey
- 1 teaspoon light soy sauce
For the Simple Peanut Sauce (Optional but highly recommended!)
- 2 tablespoons coconut cream
- 60 ml natural unsweetened peanut butter Use a smooth one for easy mixing
- 1 teaspoon rice vinegar
- 1 teaspoon Thai red curry paste Adjust to your heat preference!
- 2 teaspoons maple syrup or honey Sweetness to balance the spice and peanut butter
- 2 teaspoons light soy sauce Adds saltiness and umami
- 2-3 tablespoons water, as needed To thin the sauce to your desired dipping consistency
- 1 teaspoon sesame oil optional, Adds a lovely nutty aroma
- 1 teaspoon chili oil optional, For extra heat if you like it spicy!
- Crushed roasted peanuts optional, for garnish, For texture and extra peanut flavor!
Instructions
- Step 1: Start with the Peanut Sauce (if you’re making it): Grab a small bowl. Whisk together the coconut cream, peanut butter, rice vinegar, red curry paste, maple syrup (or honey), and light soy sauce. Start with 2 tablespoons of water and mix well. If it’s too thick for dipping, add the third tablespoon of water. Give it a good stir until it’s super smooth and creamy. If you’re using sesame oil or chili oil, stir them in now. Set this aside – it’s the perfect dipping partner! You can even make this a day ahead.
- Step 2: Prep the Skewers: If you’re using wooden skewers (which I usually do!), make sure to soak them in water for at least 30 minutes while you prep everything else. This prevents them from catching fire on the grill. Now, cut your chicken into nice, even 2.5 cm cubes. Pop them into a large mixing bowl. Get your ginger and garlic super finely chopped – the smaller the better so their flavor really gets into the chicken. Add the chopped ginger and garlic to the bowl with the chicken.
- Step 3: Marinate the Chicken: Pour the light soy sauce, dark soy sauce, coconut cream, sugar, and oyster sauce into the bowl with the chicken, ginger, and garlic. Now, get in there with your hands (or use tongs!) and mix everything really, really well. You want every single piece of chicken to be coated in that glorious marinade. Cover the bowl tightly with plastic wrap or transfer it to a zip-top bag. Pop it in the fridge. Let it hang out there for at least 1-2 hours to soak up all those flavors. If you have the time, marinating overnight is even better for maximum deliciousness!
- Step 4: Make the Glaze: In a small bowl, combine the coconut cream, honey, and light soy sauce for the glaze. Give it a little whisk. Set this aside – you’ll use it towards the end of grilling.
- Step 5: Skewer Up!: About 30 minutes before you plan to grill, take the chicken out of the fridge. This helps it cook more evenly. Now, thread the marinated chicken pieces onto your soaked skewers. Try not to pack them too tightly, but make sure they’re secure with minimal loose ends.
- Step 6: Grill Time!: Preheat your grill (charcoal or gas) to a medium-high heat, around 260°C (about 500°F). Once it’s hot, carefully place the skewers over direct heat. Grill them for a total of about 15-18 minutes. Make sure to turn them every 2-3 minutes so they brown nicely on all sides and cook through evenly. You’re looking for gorgeous grill marks and the chicken to be cooked all the way through, no longer pink inside.
- Step 7: Glaze ‘Em!: This is where the magic happens! Once the chicken is cooked through, grab your coconut cream glaze. Brush it generously over the skewers while they’re still on the grill. Flip the skewers every minute or so, brushing again, repeating this 2-3 times. The glaze will caramelize slightly, making the skewers wonderfully sticky and even more flavorful.
- Step 8: Serve & Enjoy!: Carefully remove the hot skewers from the grill and arrange them on a serving platter. Serve them immediately with that delicious Simple Peanut Sauce on the side for dipping!