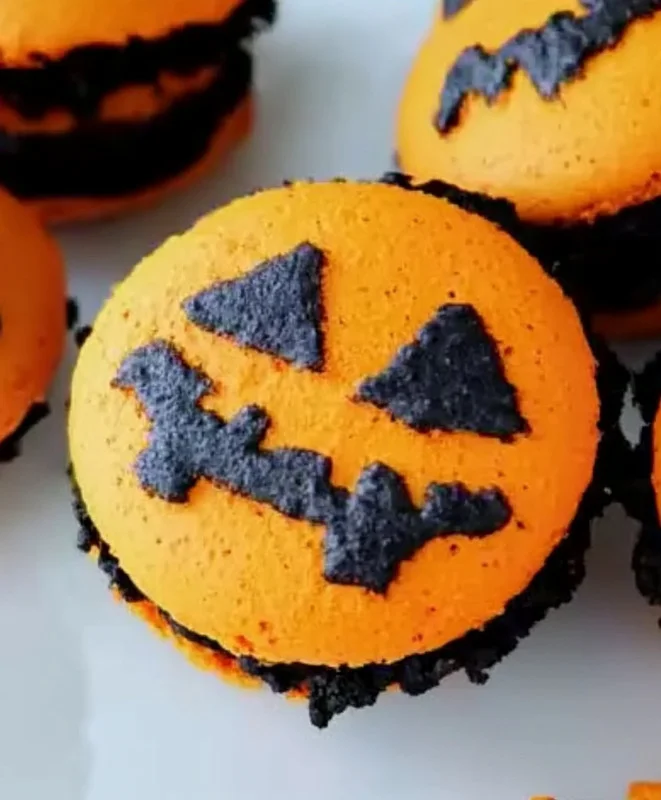
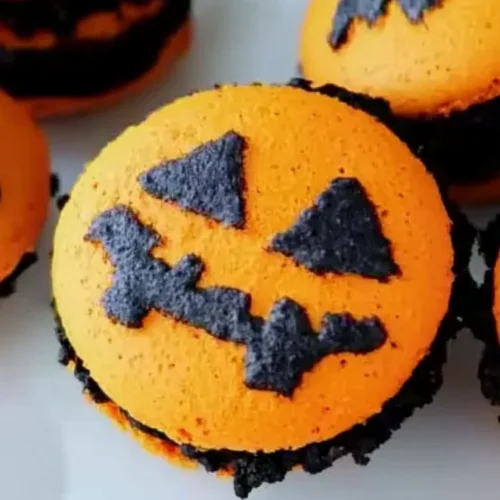
Hey there, my baking buddies! Can you feel that crisp autumn air, see the leaves changing, and smell the faint hint of pumpkin spice and… well, probably a little candy corn? That can only mean one thing: Halloween is just around the corner! And what better way to celebrate this delightfully spooky season than with a batch of homemade, vibrant, and utterly irresistible Halloween macarons? Forget those store-bought treats; we’re about to dive into making something truly special.
I know what you might be thinking: “Macarons? Aren’t those super difficult?” And while they do have a reputation for being a bit finicky, I promise you, with this guide, you’ll be piping out perfect little shells with those coveted “feet” in no time. This recipe is designed to demystify the macaron-making process, making it easy, quick, and oh-so-rewarding. Imagine the smiles when you present these beautiful, delicate cookies, filled with a rich, dark caramel mascarpone cream. They’re not just a treat; they’re a statement!
Why You’ll Love Halloween Macarons
- Fast: While they have steps, the active prep time is quicker than you think!
- Easy: My step-by-step instructions break down any intimidation factor.
- Giftable: These make the most enchanting Halloween party favors or host gifts.
- Crowd-pleasing: Who can resist a colorful, perfectly chewy, and creamy macaron? Nobody, that’s who!
Ingredients
Gathering your ingredients is the first step to any baking adventure! For macarons, precision is key, so grab your kitchen scale if you have one – it makes a world of difference for consistent results. Here’s what you’ll need for these bewitching beauties:
- ⅔ cup fine ground almond flour (scant measure): This is the star of your macaron shells! Make sure it’s super fine and not almond meal, which can be too coarse. Sifting it multiple times is a must for smooth tops.
- ⅔ cup confectioners’ sugar (scant measure): Also known as powdered sugar, this adds sweetness and structure.
- 1 tablespoon powdered orange food coloring: For that vibrant, classic Halloween pumpkin hue! Powdered is best here as liquid can affect the batter consistency.
- 2 medium egg whites, at room temperature: Room temperature egg whites whip up with more volume and stability. Don’t skip this step!
- 1 pinch cream of tartar: Your secret weapon for stabilizing those beautiful egg white peaks.
- ¼ cup superfine sugar: This dissolves more easily into your meringue, giving you a smooth, glossy finish.
- 6 ounces mascarpone cheese, at room temperature: The base for our heavenly filling! Mascarpone is rich and creamy, making for an extra luxurious bite.
- 2 tablespoons caramel sauce: Adds a sweet, buttery depth that pairs perfectly with the mascarpone. You can use store-bought or homemade caramel sauce for an extra touch.
- 1 tablespoon confectioners’ sugar: To sweeten our filling just right.
- 1 teaspoon powdered black food coloring: To transform our creamy caramel filling into a dark, mysterious Halloween treat! Again, powdered is preferred.
How to Make Halloween Macarons
Ready to create some magic? Follow these steps, and you’ll be a macaron master in no time!
- Prep Your Workspace: First things first, get those baking sheets ready! Line two baking sheets with good quality silicone mats or parchment paper. If you’re using parchment, make sure it lies perfectly flat, or your macarons might not keep their perfect round shape.
- Sift & Color Your Dry Ingredients: In your first bowl, sift together the almond flour and the ⅔ cup of confectioners’ sugar. Now, take that mixture and sift it again into a second bowl. This double sifting is crucial for getting those super smooth macaron tops! Add your powdered orange food coloring to this second bowl and whisk everything really well until the color is uniform. Set this vibrant orange mixture aside.
- Whip Those Egg Whites: Grab your stand mixer and fit it with the whisk attachment. Add your room temperature egg whites to the bowl. Start whisking on medium speed. You’ll see them start to get foamy, almost like dish soap bubbles, in about 1 to 3 minutes.
- Add Cream of Tartar: Once they’re foamy, add your pinch of cream of tartar. Continue whisking, and you’ll see the egg whites transform into a creamy, thicker foam. This should take another 1 to 3 minutes.
- Sweeten the Meringue: When the whisk starts leaving soft traces in the egg white mixture, it’s time to add your superfine sugar. Increase the mixer speed to medium-high. While the whisk is still spinning, gradually add half of the superfine sugar. Let it fully incorporate, then add the remaining sugar.
- Achieve Stiff Peaks: Keep whipping! This is where the magic happens. You’re looking for “stiff peaks” – when you lift the whisk, the meringue should hold its shape firmly and stand straight up without flopping over. This usually takes another 1 to 3 minutes.
- The Macaronage (Gentle Folding is Key!): Now for the delicate dance of “macaronage.” Using a rubber spatula, gently fold about one-third of your orange almond flour mixture into the meringue. Fold until just combined. Then, gently fold in the remaining almond flour mixture. This part is super important: do not overmix! Overmixing will make your batter too runny, and your beautiful cookies won’t rise or develop their signature “feet.” You want the batter to flow like molten lava off your spatula, creating a “figure-eight” ribbon that slowly disappears back into the bowl.
- Pipe Your Shells: Carefully pour your macaron batter into a piping bag (or a sturdy resealable plastic bag with a small corner snipped off). Pipe small, uniform circles, about 1.5 inches in diameter, onto your prepared baking sheets. Leave about 2 inches between each cookie to allow for spreading.
- Release Air Bubbles: This step is vital! Lightly rap each baking sheet firmly on your counter several times. This releases any trapped air bubbles from the batter, which helps prevent hollow macarons and encourages those lovely “feet.” You’ll see any surface bubbles pop.
- Let Them Rest (Develop Skins): Now, the patience test! Allow your piped cookies to sit at room temperature for at least 30 minutes, or even up to an hour. You’ll know they’re ready when the tops become opaque and no longer glossy, and if you gently touch one, the batter will give slightly and then bounce back. This resting period helps form a “skin” that makes the macarons rise properly and develop their ruffled feet.
- Preheat Oven & Bake: While your macarons are resting, preheat your oven to 325 degrees F (165 degrees C). Once rested, bake one baking sheet at a time in the preheated oven. They should bake for about 12 to 15 minutes, or until the cookies have risen and the bottoms start to look crinkly and firm. Once baked, remove them from the oven and let them cool completely on the baking sheet. Important: Let your oven return to temperature before baking the second batch!
- Prepare the Spooky Filling: While your orange shells are baking and cooling, let’s make that delicious, dark filling! In a clean bowl, whip together your room temperature mascarpone cheese, caramel sauce, 1 tablespoon of confectioners’ sugar, and the powdered black food coloring. Whip until it’s light and fluffy. Store this decadent filling in the refrigerator until you’re ready to assemble. For another fun fall-themed sweet treat, you might also enjoy making some Kool-Aid Swirl Candy Apples!
- Assemble Your Macarons: Once your cookie shells are completely cool (this is super important, or they’ll stick and break!), transfer your chilled filling to another clean piping bag. Pipe a dollop of filling onto the flat side of one cookie base, then gently top it with another matching cookie.
- Decorate (Optional): If you have any leftover black filling, you can use it to create spooky designs on top of your macarons – think spiderwebs, bat silhouettes, or simply a drizzle! These homemade treats are so much fun to decorate, almost as fun as whipping up a batch of Spooky Cute Peanut Butter Spider Cookies for your Halloween party.
- Rest and Enjoy!: Let your filled macarons rest for a little while before enjoying. This allows the flavors to meld and the shell to soften slightly, creating that perfect chew.
Substitutions & Additions
One of the best parts about baking is making a recipe your own! Here are some ideas to switch things up:
- Flavor the Shells: Instead of orange food coloring, you could use purple or green for different Halloween vibes! Or, for a more subtle flavor, add a teaspoon of pumpkin spice to the almond flour mixture (though this might slightly affect the color).
- Filling Variations:
- Cream Cheese Frosting: If mascarpone isn’t available, a rich cream cheese frosting can make a delightful alternative.
- Chocolate Ganache: A dark chocolate ganache would be incredibly decadent and still fit the “dark and spooky” theme!
- Jam or Curd: A tart raspberry jam or even a lemon curd could add a lovely contrast.
- Decorations: Beyond the filling, consider adding edible glitter to the orange shells before baking for an extra sparkly effect, or tiny edible googly eyes to the finished macarons for a truly whimsical look!
Tips for Success
Macarons have a reputation, but don’t let it scare you! With these tips, you’ll be a pro in no time:
- Weigh Your Ingredients: Seriously, a kitchen scale makes all the difference for macarons. It ensures accuracy, which is crucial for the delicate balance of this recipe.
- Room Temperature Egg Whites: This isn’t just a suggestion! They whip up to a much better volume and consistency.
- Don’t Overmix the Batter (Macaronage): This is arguably the most common mistake. Mix until the batter flows like a thick ribbon off your spatula and can form a “figure eight” without breaking. When it comes to Halloween treats, practice makes perfect, whether you’re mastering macarons or even a simple Halloween Puppy Chow!
- Rap the Trays: Don’t skip rapping the baking sheets on the counter. It releases air bubbles, which prevents hollow shells.
- Allow to Rest (Form Skins): This step is non-negotiable. The “skin” helps the macaron feet form correctly. Humidity can affect this, so on a very humid day, it might take longer.
- One Tray at a Time: Baking one tray at a time helps ensure consistent oven temperature and even baking, especially if your oven has hot spots.
How to Store Halloween Macarons
Once you’ve gone through all the effort to make these beauties, you want them to last!
- Room Temperature: Macarons are best stored in an airtight container in the refrigerator. They can be left at room temperature for an hour or two before serving, but any longer and the filling might soften too much.
- Refrigeration: Keep them in an airtight container in the fridge for up to 5-7 days. In fact, many people find that macarons taste even better the day after they’ve been filled, as the flavors meld and the shell softens to a delightful chewiness.
- Freezing: You can also freeze filled macarons in an airtight container for up to 1 month. Thaw them in the refrigerator overnight before bringing them to room temperature for serving.
FAQs
Got questions? I’ve got answers!
Q: My macarons don’t have “feet”! What went wrong?
A: This is usually due to one of three things: overmixing the batter (macaronage), under-whipped meringue, or not allowing the shells to rest long enough to form a skin. Double-check those steps next time!
Q: Why are my macarons hollow?
A: Hollow macarons are often caused by too much air in the batter (not rapping the trays enough), oven temperature issues (too high, causing them to rise too quickly and collapse), or again, sometimes overmixing.
Q: Can I use liquid food coloring?
A: I highly recommend powdered or gel food coloring for macarons. Liquid food coloring can add too much moisture to the batter, altering the consistency and making it harder to achieve those perfect shells.
Q: How far in advance can I make these?
A: Macaron shells can be baked and stored in an airtight container at room temperature for a couple of days, or frozen for up to a month. Once filled, they are best enjoyed within 5-7 days when stored in the refrigerator, and as I mentioned, they often taste even better after a day!
I hope you have the most wonderfully spooky and delicious time making these Halloween Macarons! They’re sure to be a showstopper at any fright night gathering. Happy baking!
For more delicious and spooky recipes, follow us on Pinterest!
Spooky Sweet Halloween Macarons: Pumpkin Orange & Black Delights
Equipment
- Kitchen Scale
- Stand Mixer
- Whisk attachment
- Rubber spatula
- Piping Bag
- Baking sheets
- Silicone Mats or Parchment Paper
- Bowls
Ingredients
For the Orange Macaron Shells
- ⅔ cup fine ground almond flour scant measure
- ⅔ cup confectioners’ sugar scant measure
- 1 tablespoon powdered orange food coloring
- 2 medium egg whites at room temperature
- 1 pinch cream of tartar
- ¼ cup superfine sugar
For the Dark Caramel Mascarpone Cream Filling
- 6 ounces mascarpone cheese at room temperature
- 2 tablespoons caramel sauce
- 1 tablespoon confectioners’ sugar
- 1 teaspoon powdered black food coloring
Instructions
- Step 1: Prep Your Workspace: Line two baking sheets with good quality silicone mats or parchment paper. If using parchment, ensure it lies perfectly flat.
- Step 2: Sift & Color Your Dry Ingredients: In your first bowl, sift together the almond flour and ⅔ cup of confectioners’ sugar. Sift this mixture again into a second bowl. Add the powdered orange food coloring to this second bowl and whisk everything well until the color is uniform. Set aside.
- Step 3: Whip Those Egg Whites: In a stand mixer with the whisk attachment, add room temperature egg whites. Whisk on medium speed for 1-3 minutes until foamy.
- Step 4: Add Cream of Tartar: Once foamy, add the pinch of cream of tartar. Continue whisking for another 1-3 minutes until the egg whites transform into a creamy, thicker foam.
- Step 5: Sweeten the Meringue: When the whisk starts leaving soft traces, increase mixer speed to medium-high. Gradually add half of the superfine sugar, letting it fully incorporate, then add the remaining sugar.
- Step 6: Achieve Stiff Peaks: Keep whipping until the meringue holds its shape firmly and stands straight up without flopping over when the whisk is lifted (1-3 minutes).
- Step 7: The Macaronage: Using a rubber spatula, gently fold about one-third of your orange almond flour mixture into the meringue until just combined. Gently fold in the remaining almond flour mixture. Do not overmix; the batter should flow like molten lava off your spatula, creating a ‘figure-eight’ ribbon that slowly disappears.
- Step 8: Pipe Your Shells: Carefully pour the macaron batter into a piping bag. Pipe small, uniform circles, about 1.5 inches in diameter, onto your prepared baking sheets, leaving about 2 inches between each cookie.
- Step 9: Release Air Bubbles: Lightly rap each baking sheet firmly on your counter several times to release trapped air bubbles and prevent hollow macarons.
- Step 10: Let Them Rest (Develop Skins): Allow piped cookies to sit at room temperature for at least 30 minutes to an hour, until the tops become opaque, no longer glossy, and give slightly when gently touched.
- Step 11: Preheat Oven & Bake: While resting, preheat oven to 325 degrees F (165 degrees C). Bake one baking sheet at a time for 12-15 minutes, or until cookies have risen and bottoms look crinkly and firm. Remove and cool completely on the baking sheet. Let your oven return to temperature before baking the second batch.
- Step 12: Prepare the Spooky Filling: In a clean bowl, whip together room temperature mascarpone cheese, caramel sauce, 1 tablespoon of confectioners’ sugar, and powdered black food coloring until light and fluffy. Store in the refrigerator until ready to assemble.
- Step 13: Assemble Your Macarons: Once cookie shells are completely cool, transfer chilled filling to another clean piping bag. Pipe a dollop of filling onto the flat side of one cookie base, then gently top with another matching cookie.
- Step 14: Decorate (Optional): Use any leftover black filling to create spooky designs on top of your macarons, such as spiderwebs or bat silhouettes.
- Step 15: Rest and Enjoy!: Let filled macarons rest for a little while before enjoying to allow flavors to meld and the shell to soften slightly.