Oh, Halloween! The costumes, the spooky decorations, the crisp autumn air… and that glorious, overflowing bounty of candy! For a few days, it’s pure sugary bliss. But then, as the sugar rush fades, you’re left with a mountain of miniature candy bars and individually wrapped delights. What do you do with it all? Let it sit in a bowl until next year? No way! I’ve got the perfect solution for you: turn that leftover loot into the most amazing, chewy, and utterly delightful cookies you’ve ever tasted. This recipe is an absolute lifesaver, transforming forgotten candy into a fresh, warm treat in no time!
Why You’ll Love Leftover Halloween Candy Cookies
- Fast
- Easy
- Giftable
- Crowd-pleasing
Ingredients
Gather ’round, my sweet-toothed friends, because these simple ingredients are about to work some serious magic:
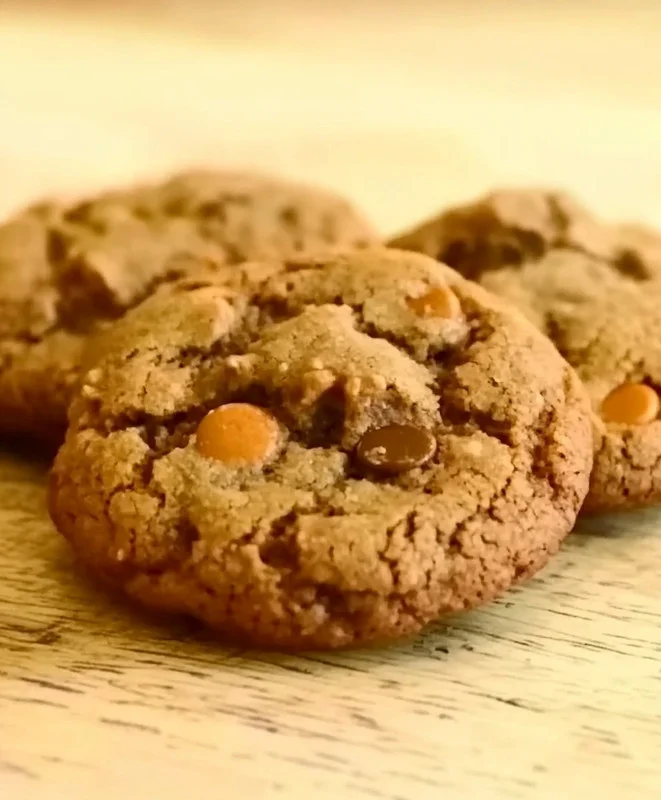
- 2 cups chopped candy bars: This is where the fun begins! Think Snickers, Milky Ways, Heath bars, Reese’s cups, Butterfingers—whatever chocolate-based candy bars you have lurking in your trick-or-treat bag. Chop ’em up into bite-sized pieces; they’ll melt beautifully.
- 1 cup white sugar: Just your standard granulated sugar to provide that classic cookie sweetness.
- ½ cup butter: Unsalted is usually my go-to for baking, but if you only have salted, just reduce any added salt in your recipe (though this one doesn’t call for extra salt anyway!). It’s going to make these cookies rich and tender.
- 2 eggs: Our binding agents, bringing everything together in perfect harmony.
- 2 ¼ cups all-purpose flour: The backbone of our cookie dough, giving it structure.
- 1 teaspoon baking soda: This little wonder helps our cookies get that lovely rise and soft chewiness.
- Cooking spray: For greasing those baking sheets and ensuring your delicious cookies don’t stick!
How to Make Leftover Halloween Candy Cookies
Alright, let’s get baking! You’re going to be amazed at how simple this process is. Just follow along, and we’ll have warm cookies in your hands before you know it.
- First things first, grab a sturdy saucepan and add your chopped candy bars, white sugar, and butter. Place it over medium heat on your stovetop. Stir gently and continuously until everything is beautifully melted and smooth. The goal here is a lovely, cohesive mixture, not scorched candy, so keep that heat moderate! Once melted, remove the pan from the heat and let it cool down a bit, about 5 minutes. You don’t want it piping hot when you add the next ingredients.
- Now, for the eggs! Beat them into your cooled candy mixture one at a time. Mix thoroughly after each egg until your mixture is smooth and glossy. Then, gradually add in your all-purpose flour and baking soda, mixing until just combined. You’ll end up with a wonderfully sticky, rich cookie dough. Don’t overmix here; just get everything incorporated.
- This next step is crucial for perfect cookies: chilling! Place your sticky dough in the refrigerator for about 1 hour. This time allows the butter to firm up, making the dough much easier to handle and preventing your cookies from spreading too much in the oven.
- While your dough is chilling out, go ahead and preheat your oven to 350 degrees F (175 degrees C). Also, get two baking sheets ready by giving them a good spray with cooking spray.
- Once your dough is chilled and ready, it’s time to roll! Scoop out about 1 ½ teaspoonfuls of dough and roll them into neat little balls. Place these dough balls onto your prepared baking sheets, making sure to leave about 1 inch of space between each one. This gives them room to expand without merging into one giant cookie blob!
- Finally, bake your cookies in the preheated oven for 10 to 12 minutes. You’re looking for them to be lightly brown around the edges and fluffy in the center. They might still look a little soft when you pull them out, but they’ll set up as they cool. Let them cool on the baking sheets for a few minutes before transferring them to a wire rack to cool completely.
Substitutions & Additions
This recipe is incredibly forgiving and truly a canvas for creativity! Don’t feel limited to just chocolate bars; think outside the wrapper!
- Candy Swaps: While chocolate bars melt beautifully, you can also add things like M&Ms (just fold them in at the end with the flour), chopped caramel candies (they’ll melt into delicious pockets), or even crushed potato chips for a sweet and salty crunch! If you’re a fan of those colorful candies, you might also love my recipe for Soft Baked M&M Cookies!
- Nutty Boost: Stir in a handful of chopped pecans, walnuts, or peanuts for extra texture and flavor.
- Extracts: A splash of vanilla extract (a teaspoon or so) or almond extract can enhance the overall flavor profile.
- Sprinkles: If you want to make them even more festive, roll the dough balls in sprinkles before baking!
- Flavor Combos: If you’re looking for another indulgent twist on cookies, perhaps something with a delightful chew and a hint of salt, you should definitely check out my recipe for Salted Caramel Chocolate Chip Cookies.
Tips for Success
To ensure your Leftover Halloween Candy Cookies turn out perfectly every time, keep these friendly tips in mind:
- Don’t Scorch the Candy: When melting the candy, sugar, and butter, keep the heat on medium and stir constantly. Sugar can burn quickly, and you don’t want a bitter taste in your cookies!
- Cool the Mixture: This is super important! Adding eggs to a hot candy mixture can “scramble” them, leading to an undesirable texture. Let it cool for at least 5 minutes before incorporating the eggs.
- Chill the Dough: I know, waiting is hard! But chilling the dough for at least an hour prevents your cookies from spreading too much and makes them much easier to roll. It also deepens the flavors.
- Don’t Overbake: These cookies are meant to be soft and chewy. Pull them from the oven when the edges are just set and lightly golden, even if the centers look a little underdone. They will continue to cook slightly on the hot baking sheet.
- Uniform Balls: Try to make your dough balls roughly the same size. This ensures even baking, so all your cookies are ready at the same time.
- Prep Ahead: You can make the dough, chill it, and then bake off a few cookies at a time whenever a craving strikes! Or, for another delightful baking project to use up extra chocolate or baking ingredients, consider whipping up some easy chocolate cupcakes.
How to Store Leftover Halloween Candy Cookies
Once your delicious cookies have cooled, you’ll want to store them properly to keep them fresh and soft.
- Room Temperature: Store baked cookies in an airtight container at room temperature for up to 3-4 days. For best results, I like to place a slice of bread in the container with them – it helps keep them super soft!
- Freezing Baked Cookies: You can freeze fully cooled cookies in a freezer-safe bag or container for up to 3 months. Thaw them at room temperature, or pop them in the microwave for a few seconds for a warm, gooey treat.
- Freezing Dough: Roll the dough into balls and place them on a baking sheet lined with parchment paper. Freeze until solid, then transfer the frozen dough balls to a freezer-safe bag. They’ll keep for up to 3 months. When you’re ready to bake, just place them on a prepared baking sheet and add a couple of extra minutes to the baking time.
FAQs
Q: Can I use any kind of Halloween candy?
A: For melting into the dough, chocolate-based candy bars work best (think Snickers, Hershey’s, Milky Way, Reese’s cups). Candies like Skittles, Starburst, or gummies won’t melt the same way and are better chopped and folded into the dough at the end, or saved for a different treat.
Q: Why do I need to chill the dough?
A: Chilling the dough solidifies the butter, which prevents the cookies from spreading too much in the oven. It also makes the dough less sticky and much easier to handle when rolling into balls. Plus, it gives the flavors a chance to meld together for a richer taste!
Q: Can I freeze the cookie dough for later?
A: Absolutely! This is a fantastic trick. Roll the dough into individual balls, place them on a baking sheet, and freeze until solid. Then transfer the frozen balls to a freezer-safe bag. You can bake them straight from frozen, just add a few extra minutes to the baking time.
Q: My candy mixture looks greasy after melting. Is that normal?
A: Sometimes, especially if you use certain types of candy bars, the chocolate and other components can separate a little, making it look slightly greasy. Don’t worry! Once you beat in the eggs and then the flour, it will emulsify and come together into a smooth, cohesive dough.
For more delicious recipes and kitchen inspiration, be sure to follow us on Pinterest!

Leftover Halloween Candy Cookies
Equipment
- saucepan
- Baking sheets
- Wire rack
Ingredients
- 2 cups chopped candy bars chocolate-based, e.g., Snickers, Milky Ways, Heath bars, Reese's cups, Butterfingers
- 1 cup white sugar granulated
- 0.5 cup butter unsalted
- 2 eggs
- 2.25 cups all-purpose flour
- 1 tsp baking soda
- Cooking spray for greasing baking sheets
Instructions
- Step 1: Grab a sturdy saucepan and add your chopped candy bars, white sugar, and butter. Place it over medium heat, stirring gently and continuously until everything is beautifully melted and smooth. Remove from heat and let it cool for about 5 minutes.
- Step 2: Beat eggs into the cooled candy mixture one at a time, mixing thoroughly after each. Gradually add the all-purpose flour and baking soda, mixing until just combined. Do not overmix.
- Step 3: Place the sticky dough in the refrigerator and chill for about 1 hour. This allows the butter to firm up and makes the dough easier to handle.
- Step 4: While the dough chills, preheat your oven to 350 degrees F (175 degrees C). Prepare two baking sheets by spraying them with cooking spray.
- Step 5: Once the dough is chilled, scoop out about 1 ½ teaspoonfuls and roll them into neat balls. Place them onto the prepared baking sheets, leaving about 1 inch of space between each.
- Step 6: Bake in the preheated oven for 10 to 12 minutes, until lightly brown around the edges and fluffy in the center. Let cool on the baking sheets for a few minutes before transferring to a wire rack to cool completely.