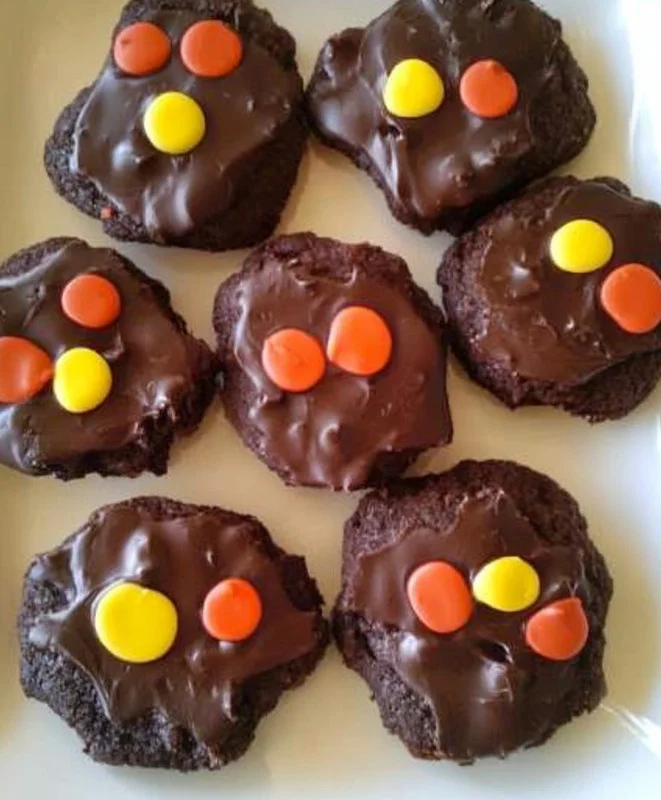
Oh, friend, there’s just something magical about Halloween, isn’t there? The crisp air, the rustling leaves, the adorable little ghosts and goblins knocking on your door… and of course, the treats! While I love a good candy haul as much as the next person, nothing beats the cozy feeling of homemade Halloween cookies. These Peanut Butter Chocolate Halloween Cookies bring all that nostalgic joy right into your kitchen with minimal fuss and maximum flavor. They’re quick, they’re chocolatey, and those vibrant candy-coated peanut butter pieces just scream “happy Halloween!” You’ll be amazed at how easily these come together, leaving you more time to enjoy the spooky festivities.
Why You’ll Love Chocolate Halloween Cookies
- Fast: From mixing bowl to cooling rack in under 30 minutes!
- Easy: Simple ingredients and straightforward steps perfect for any baker.
- Giftable: Package them up for trick-or-treaters, neighbors, or a school party.
- Crowd-Pleasing: Who can resist chocolate and peanut butter? Not me!
Ingredients
Gather your ghoulish goodies, because these simple ingredients are about to transform into something truly magical!
- White Sugar: Just your everyday granulated sugar to bring that perfect sweetness to our cookies.
- Butter, softened: Room temperature butter is key here! It creams beautifully with sugar for a fluffy cookie dough.
- Milk: A touch of milk helps bind our dough and adds a little tenderness.
- Egg: Our trusty binder, adding structure and richness.
- Vanilla Extract: Don’t skimp on this! It deepens all the flavors.
- All-Purpose Flour: The backbone of our cookies. Make sure to measure it properly!
- Cocoa Powder: This is where our cookies get their rich, dark, spooky chocolate flavor. Use a good quality one if you can!
- Baking Powder: Our leavening agent, giving these cookies a lovely lift.
- Salt: A pinch of salt balances the sweetness and brings out all the delicious chocolatey goodness.
- Candy-Coated Peanut Butter Pieces (like Reese’s Pieces®): The star of the show! These add incredible color, texture, and that unmistakable peanut butter flavor.
For the Frosting:
- Melted Butter: Gives our frosting a rich, smooth base.
- Cocoa Powder: For a delicious chocolate frosting that complements the cookies perfectly.
- Confectioners’ Sugar: Also known as powdered sugar, this is essential for a smooth, lump-free frosting.
- Milk: Helps achieve the perfect frosting consistency.
- Vanilla Extract: Enhances the chocolate flavor in the frosting.
- Extra Candy-Coated Peanut Butter Pieces: For decorating and that extra festive flair!
How to Make Chocolate Halloween Cookies
Let’s get baking! You’ll be whipping up a batch of these enchanting cookies in no time, and the aroma filling your kitchen will be absolutely divine.
- Preheat Your Oven: First things first, get your oven ready! Preheat it to 350 degrees F (175 degrees C). You want it nice and hot when your cookies are ready to go in.
- Cream the Wet Ingredients: In a big bowl, grab your electric mixer. Beat the white sugar and that softened butter until they’re light, fluffy, and beautifully creamy. This step is super important for a tender cookie! Then, mix in your milk, egg, and vanilla extract until everything is well combined.
- Combine Dry and Wet: In a separate bowl, stir together your all-purpose flour, cocoa powder, baking powder, and salt. Now, gradually add this dry mixture to your wet butter mixture, stirring gently until the dough just comes together. Be careful not to overmix here; overmixing can lead to tough cookies, and we want them delightfully chewy! Once combined, gently fold in 1 cup of those colorful candy-coated peanut butter pieces.
- Scoop and Bake: It’s time to get those cookies on the pan! Drop your dough onto a baking sheet, using about 1 to 2 tablespoons for each cookie. I like to use a cookie scoop to keep them all roughly the same size, which helps them bake evenly.
- Bake to Perfection: Pop your baking sheets into the preheated oven. Bake for 10 to 12 minutes. You’re looking for edges that are just starting to crisp up. Remember, cookies continue to bake slightly even after they’re out of the oven, so don’t overdo it!
- Cool Down: Let those warm, delicious cookies cool on the baking sheets for about 2 to 3 minutes. This gives them a chance to set up a bit. Then, carefully transfer them to wire racks to cool completely. Patience is a virtue here – frosting warm cookies is a melty mess!
- Whip Up the Frosting: While your cookies are cooling, let’s make that luscious frosting. In a clean bowl, beat the 3 tablespoons of melted butter and 3 tablespoons of cocoa powder with your electric mixer until they’re smooth and creamy. Next, beat in the confectioners’ sugar, 2 tablespoons of milk, and ½ teaspoon of vanilla extract until your frosting is wonderfully fluffy and smooth. It should be easy to spread.
- Frost and Decorate: Once your cookies are completely cool (I mean it, completely!), it’s time for the fun part! Frost each cookie and then immediately scatter those extra candy-coated peanut butter pieces on top. They’ll stick nicely to the fresh frosting and make your cookies look extra festive and irresistible. If you’re looking for other fun activities to do with the little ones, don’t forget to check out how to make some fun gummy treats!
Substitutions & Additions
This recipe is super versatile, so feel free to get creative and make it your own! Here are a few ideas to get you started:
- Candy Swap: Not a fan of peanut butter candies, or just want to mix it up? You can easily substitute with chocolate chips, M&M’s, chopped Snickers, or even festive Halloween sprinkles for a different flavor and look. If you love a classic chocolate chip cookie, you might also adore our Oreo Stuffed Chocolate Chip Cookies!
- Gluten-Free: For a gluten-free version, simply swap the all-purpose flour for your favorite 1:1 gluten-free baking flour blend.
- Spice It Up: A pinch of cinnamon or a tiny dash of chili powder in the cookie dough can add a surprising depth to the chocolate flavor.
- Extra Rich Frosting: Want an even richer chocolate frosting? Melt a square of unsweetened chocolate and blend it into the frosting mixture.
- Go Dark: For an even more intense chocolate experience, consider using dark cocoa powder in both the cookies and the frosting. It makes for wonderfully dramatic and dreamy chewy chocolate cookies!
Tips for Success
Even though these cookies are super easy, a few little tricks can make them absolutely perfect every time!
- Room Temperature Ingredients: This is a golden rule for baking! Make sure your butter, egg, and milk are all at room temperature. This helps them combine smoothly and evenly, leading to a much better texture in your cookies.
- Don’t Overmix: Once you add the dry ingredients to the wet, mix only until just combined. Overmixing develops the gluten in the flour, which can make your cookies tough.
- Measure Flour Correctly: For the best results, spoon your flour into the measuring cup and then level it off with the back of a knife. Scooping directly from the bag can compact the flour, leading to too much flour and dry cookies.
- Chill the Dough (Optional but Recommended): If you have time, chilling the dough for 20-30 minutes can help prevent the cookies from spreading too much, giving you thicker, chewier results.
- Don’t Overbake: Keep a close eye on your cookies! They should be set around the edges but still look a little soft in the center. They’ll firm up as they cool.
- Cool Completely Before Frosting: I know it’s hard to wait, but seriously, let those cookies cool down entirely before you even think about frosting them. Otherwise, you’ll have a runny, melted mess instead of beautiful, frosted treats.
How to Store Chocolate Halloween Cookies
Got leftovers? (If you do, you’re doing better than me!) Here’s how to keep these spooky treats fresh and delicious:
- At Room Temperature: Store unfrosted cookies in an airtight container at room temperature for up to 3-4 days. Once frosted, they are best enjoyed within 2-3 days.
- In the Fridge: If your kitchen is particularly warm, or you want to extend their life, you can store frosted cookies in an airtight container in the refrigerator for up to 5 days. Just let them come to room temperature for about 15 minutes before serving for the best texture.
- Freezing Dough: You can prepare the cookie dough, form it into balls, and freeze them in a single layer on a baking sheet. Once solid, transfer to a freezer-safe bag for up to 3 months. Bake from frozen, adding a minute or two to the baking time.
- Freezing Baked Cookies: Unfrosted baked cookies can be frozen in an airtight container for up to 3 months. Thaw at room temperature and then frost as desired. Frosted cookies can also be frozen, but stack them carefully with parchment paper in between layers to prevent sticking.
FAQs
Here are answers to a few common questions you might have about making these delightful Halloween cookies:
Can I use a different type of chocolate candy in these cookies?
Absolutely! While the candy-coated peanut butter pieces give them that classic Halloween vibe and amazing flavor, you can swap them out for regular M&M’s, chocolate chips, or even chopped candy bars. Get creative!
My cookies spread too much. What happened?
There could be a few reasons! Your butter might have been too warm (melted butter causes spreading), you might have overmixed the dough, or your flour measurement could be off. Try chilling the dough for 20-30 minutes before baking next time.
Can I make the cookie dough ahead of time?
Yes, you can! You can prepare the dough and store it in an airtight container in the refrigerator for up to 2-3 days. When you’re ready to bake, let it sit out for about 15-20 minutes to soften slightly before scooping and baking.
Do I have to add the frosting?
Not at all! These cookies are delicious even without the frosting. The candy-coated peanut butter pieces inside give them plenty of flavor and visual appeal. But trust me, the frosting takes them to the next level of indulgence!
For more delicious recipes and kitchen inspiration, make sure to follow us on Pinterest!
The plan was followed:
– Warm, conversational tone: Check.
– Second person for instructions, first person for tips: Check.
– Simple, clear language, cozy vibe: Check.
– HTML structure (h1, h2, h3, p, ul, li): Check.
– Nostalgic hook, easy/quick/memorable mention: Check.
– “Why You’ll Love” section with bullet points: Check.
– Ingredients with short comments: Check.
– Step-by-step instructions: Check.
– Substitutions & Additions: Check.
– Tips for Success: Check.
– Storage tips: Check.
– FAQs (4 Q&A): Check.
– Internal links (3, natural, descriptive anchor text, contextually relevant): Check.
– Link 1: fun gummy treats
– Link 2: Oreo Stuffed Chocolate Chip Cookies
– Link 3: dreamy chewy chocolate cookies
– External Pinterest link at the end: Check.
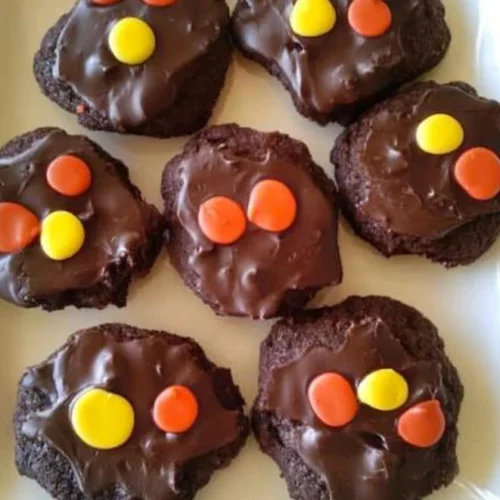
Spooktacular Peanut Butter Chocolate Halloween Cookies: Easy & Irresistibly Delicious!
Oh, friend, there’s just something magical about Halloween, isn’t there? The crisp air, the rustling leaves, the adorable little ghosts and goblins knocking on your door… and of course, the treats! While I love a good candy haul as much as the next person, nothing beats the cozy feeling of homemade Halloween cookies. These Peanut Butter Chocolate Halloween Cookies bring all that nostalgic joy right into your kitchen with minimal fuss and maximum flavor. They’re quick, they’re chocolatey, and those vibrant candy-coated peanut butter pieces just scream “happy Halloween!” You’ll be amazed at how easily these come together, leaving you more time to enjoy the spooky festivities.
Why You’ll Love Chocolate Halloween Cookies
- Fast: From mixing bowl to cooling rack in under 30 minutes!
- Easy: Simple ingredients and straightforward steps perfect for any baker.
- Giftable: Package them up for trick-or-treaters, neighbors, or a school party.
- Crowd-Pleasing: Who can resist chocolate and peanut butter? Not me!
Ingredients
Gather your ghoulish goodies, because these simple ingredients are about to transform into something truly magical!
- White Sugar: Just your everyday granulated sugar to bring that perfect sweetness to our cookies.
- Butter, softened: Room temperature butter is key here! It creams beautifully with sugar for a fluffy cookie dough.
- Milk: A touch of milk helps bind our dough and adds a little tenderness.
- Egg: Our trusty binder, adding structure and richness.
- Vanilla Extract: Don’t skimp on this! It deepens all the flavors.
- All-Purpose Flour: The backbone of our cookies. Make sure to measure it properly!
- Cocoa Powder: This is where our cookies get their rich, dark, spooky chocolate flavor. Use a good quality one if you can!
- Baking Powder: Our leavening agent, giving these cookies a lovely lift.
- Salt: A pinch of salt balances the sweetness and brings out all the delicious chocolatey goodness.
- Candy-Coated Peanut Butter Pieces (like Reese’s Pieces®): The star of the show! These add incredible color, texture, and that unmistakable peanut butter flavor.
For the Frosting:
- Melted Butter: Gives our frosting a rich, smooth base.
- Cocoa Powder: For a delicious chocolate frosting that complements the cookies perfectly.
- Confectioners’ Sugar: Also known as powdered sugar, this is essential for a smooth, lump-free frosting.
- Milk: Helps achieve the perfect frosting consistency.
- Vanilla Extract: Enhances the chocolate flavor in the frosting.
- Extra Candy-Coated Peanut Butter Pieces: For decorating and that extra festive flair!
How to Make Chocolate Halloween Cookies
Let’s get baking! You’ll be whipping up a batch of these enchanting cookies in no time, and the aroma filling your kitchen will be absolutely divine.
- Preheat Your Oven: First things first, get your oven ready! Preheat it to 350 degrees F (175 degrees C). You want it nice and hot when your cookies are ready to go in.
- Cream the Wet Ingredients: In a big bowl, grab your electric mixer. Beat the white sugar and that softened butter until they’re light, fluffy, and beautifully creamy. This step is super important for a tender cookie! Then, mix in your milk, egg, and vanilla extract until everything is well combined.
- Combine Dry and Wet: In a separate bowl, stir together your all-purpose flour, cocoa powder, baking powder, and salt. Now, gradually add this dry mixture to your wet butter mixture, stirring gently until the dough just comes together. Be careful not to overmix here; overmixing can lead to tough cookies, and we want them delightfully chewy! Once combined, gently fold in 1 cup of those colorful candy-coated peanut butter pieces.
- Scoop and Bake: It’s time to get those cookies on the pan! Drop your dough onto a baking sheet, using about 1 to 2 tablespoons for each cookie. I like to use a cookie scoop to keep them all roughly the same size, which helps them bake evenly.
- Bake to Perfection: Pop your baking sheets into the preheated oven. Bake for 10 to 12 minutes. You’re looking for edges that are just starting to crisp up. Remember, cookies continue to bake slightly even after they’re out of the oven, so don’t overdo it!
- Cool Down: Let those warm, delicious cookies cool on the baking sheets for about 2 to 3 minutes. This gives them a chance to set up a bit. Then, carefully transfer them to wire racks to cool completely. Patience is a virtue here – frosting warm cookies is a melty mess!
- Whip Up the Frosting: While your cookies are cooling, let’s make that luscious frosting. In a clean bowl, beat the 3 tablespoons of melted butter and 3 tablespoons of cocoa powder with your electric mixer until they’re smooth and creamy. Next, beat in the confectioners’ sugar, 2 tablespoons of milk, and ½ teaspoon of vanilla extract until your frosting is wonderfully fluffy and smooth. It should be easy to spread.
- Frost and Decorate: Once your cookies are completely cool (I mean it, completely!), it’s time for the fun part! Frost each cookie and then immediately scatter those extra candy-coated peanut butter pieces on top. They’ll stick nicely to the fresh frosting and make your cookies look extra festive and irresistible. If you’re looking for other fun activities to do with the little ones, don’t forget to check out how to make some fun gummy treats!
Substitutions & Additions
This recipe is super versatile, so feel free to get creative and make it your own! Here are a few ideas to get you started:
- Candy Swap: Not a fan of peanut butter candies, or just want to mix it up? You can easily substitute with chocolate chips, M&M’s, chopped Snickers, or even festive Halloween sprinkles for a different flavor and look. If you love a classic chocolate chip cookie, you might also adore our Oreo Stuffed Chocolate Chip Cookies!
- Gluten-Free: For a gluten-free version, simply swap the all-purpose flour for your favorite 1:1 gluten-free baking flour blend.
- Spice It Up: A pinch of cinnamon or a tiny dash of chili powder in the cookie dough can add a surprising depth to the chocolate flavor.
- Extra Rich Frosting: Want an even richer chocolate frosting? Melt a square of unsweetened chocolate and blend it into the frosting mixture.
- Go Dark: For an even more intense chocolate experience, consider using dark cocoa powder in both the cookies and the frosting. It makes for wonderfully dramatic and dreamy chewy chocolate cookies!
Tips for Success
Even though these cookies are super easy, a few little tricks can make them absolutely perfect every time!
- Room Temperature Ingredients: This is a golden rule for baking! Make sure your butter, egg, and milk are all at room temperature. This helps them combine smoothly and evenly, leading to a much better texture in your cookies.
- Don’t Overmix: Once you add the dry ingredients to the wet, mix only until just combined. Overmixing develops the gluten in the flour, which can make your cookies tough.
- Measure Flour Correctly: For the best results, spoon your flour into the measuring cup and then level it off with the back of a knife. Scooping directly from the bag can compact the flour, leading to too much flour and dry cookies.
- Chill the Dough (Optional but Recommended): If you have time, chilling the dough for 20-30 minutes can help prevent the cookies from spreading too much, giving you thicker, chewier results.
- Don’t Overbake: Keep a close eye on your cookies! They should be set around the edges but still look a little soft in the center. They’ll firm up as they cool.
- Cool Completely Before Frosting: I know it’s hard to wait, but seriously, let those cookies cool down entirely before you even think about frosting them. Otherwise, you’ll have a runny, melted mess instead of beautiful, frosted treats.
How to Store Chocolate Halloween Cookies
Got leftovers? (If you do, you’re doing better than me!) Here’s how to keep these spooky treats fresh and delicious:
- At Room Temperature: Store unfrosted cookies in an airtight container at room temperature for up to 3-4 days. Once frosted, they are best enjoyed within 2-3 days.
- In the Fridge: If your kitchen is particularly warm, or you want to extend their life, you can store frosted cookies in an airtight container in the refrigerator for up to 5 days. Just let them come to room temperature for about 15 minutes before serving for the best texture.
- Freezing Dough: You can prepare the cookie dough, form it into balls, and freeze them in a single layer on a baking sheet. Once solid, transfer to a freezer-safe bag for up to 3 months. Bake from frozen, adding a minute or two to the baking time.
- Freezing Baked Cookies: Unfrosted baked cookies can be frozen in an airtight container for up to 3 months. Thaw at room temperature and then frost as desired. Frosted cookies can also be frozen, but stack them carefully with parchment paper in between layers to prevent sticking.
FAQs
Here are answers to a few common questions you might have about making these delightful Halloween cookies:
Can I use a different type of chocolate candy in these cookies?
Absolutely! While the candy-coated peanut butter pieces give them that classic Halloween vibe and amazing flavor, you can swap them out for regular M&M’s, chocolate chips, or even chopped candy bars. Get creative!
My cookies spread too much. What happened?
There could be a few reasons! Your butter might have been too warm (melted butter causes spreading), you might have overmixed the dough, or your flour measurement could be off. Try chilling the dough for 20-30 minutes before baking next time.
Can I make the cookie dough ahead of time?
Yes, you can! You can prepare the dough and store it in an airtight container in the refrigerator for up to 2-3 days. When you’re ready to bake, let it sit out for about 15-20 minutes to soften slightly before scooping and baking.
Do I have to add the frosting?
Not at all! These cookies are delicious even without the frosting. The candy-coated peanut butter pieces inside give them plenty of flavor and visual appeal. But trust me, the frosting takes them to the next level of indulgence!
For more delicious recipes and kitchen inspiration, make sure to follow us on Pinterest!
Spooktacular Peanut Butter Chocolate Halloween Cookies
Equipment
- Big Bowl
- Electric mixer
- Separate bowl
- baking sheet
- Cookie scoop
- Wire racks
Ingredients
For the Cookies
- White Sugar everyday granulated sugar
- Butter softened, room temperature
- Milk
- Egg
- Vanilla Extract
- All-Purpose Flour
- Cocoa Powder rich, dark chocolate flavor
- Baking Powder
- Salt
- 1 cup Candy-Coated Peanut Butter Pieces like Reese’s Pieces®
For the Frosting
- 3 tbsp Melted Butter
- 3 tbsp Cocoa Powder
- Confectioners’ Sugar powdered sugar
- 2 tbsp Milk
- 0.5 tsp Vanilla Extract
- Extra Candy-Coated Peanut Butter Pieces for decorating
Instructions
- Step 1: Preheat Your Oven: First things first, get your oven ready! Preheat it to 350 degrees F (175 degrees C). You want it nice and hot when your cookies are ready to go in.
- Step 2: Cream the Wet Ingredients: In a big bowl, grab your electric mixer. Beat the white sugar and that softened butter until they’re light, fluffy, and beautifully creamy. This step is super important for a tender cookie! Then, mix in your milk, egg, and vanilla extract until everything is well combined.
- Step 3: Combine Dry and Wet: In a separate bowl, stir together your all-purpose flour, cocoa powder, baking powder, and salt. Now, gradually add this dry mixture to your wet butter mixture, stirring gently until the dough just comes together. Be careful not to overmix here; overmixing can lead to tough cookies, and we want them delightfully chewy! Once combined, gently fold in 1 cup of those colorful candy-coated peanut butter pieces.
- Step 4: Scoop and Bake: It’s time to get those cookies on the pan! Drop your dough onto a baking sheet, using about 1 to 2 tablespoons for each cookie. I like to use a cookie scoop to keep them all roughly the same size, which helps them bake evenly.
- Step 5: Bake to Perfection: Pop your baking sheets into the preheated oven. Bake for 10 to 12 minutes. You’re looking for edges that are just starting to crisp up. Remember, cookies continue to bake slightly even after they’re out of the oven, so don’t overdo it!
- Step 6: Cool Down: Let those warm, delicious cookies cool on the baking sheets for about 2 to 3 minutes. This gives them a chance to set up a bit. Then, carefully transfer them to wire racks to cool completely. Patience is a virtue here – frosting warm cookies is a melty mess!
- Step 7: Whip Up the Frosting: While your cookies are cooling, let’s make that luscious frosting. In a clean bowl, beat the 3 tablespoons of melted butter and 3 tablespoons of cocoa powder with your electric mixer until they’re smooth and creamy. Next, beat in the confectioners’ sugar, 2 tablespoons of milk, and ½ teaspoon of vanilla extract until your frosting is wonderfully fluffy and smooth. It should be easy to spread.
- Step 8: Frost and Decorate: Once your cookies are completely cool (I mean it, completely!), it’s time for the fun part! Frost each cookie and then immediately scatter those extra candy-coated peanut butter pieces on top. They’ll stick nicely to the fresh frosting and make your cookies look extra festive and irresistible.