
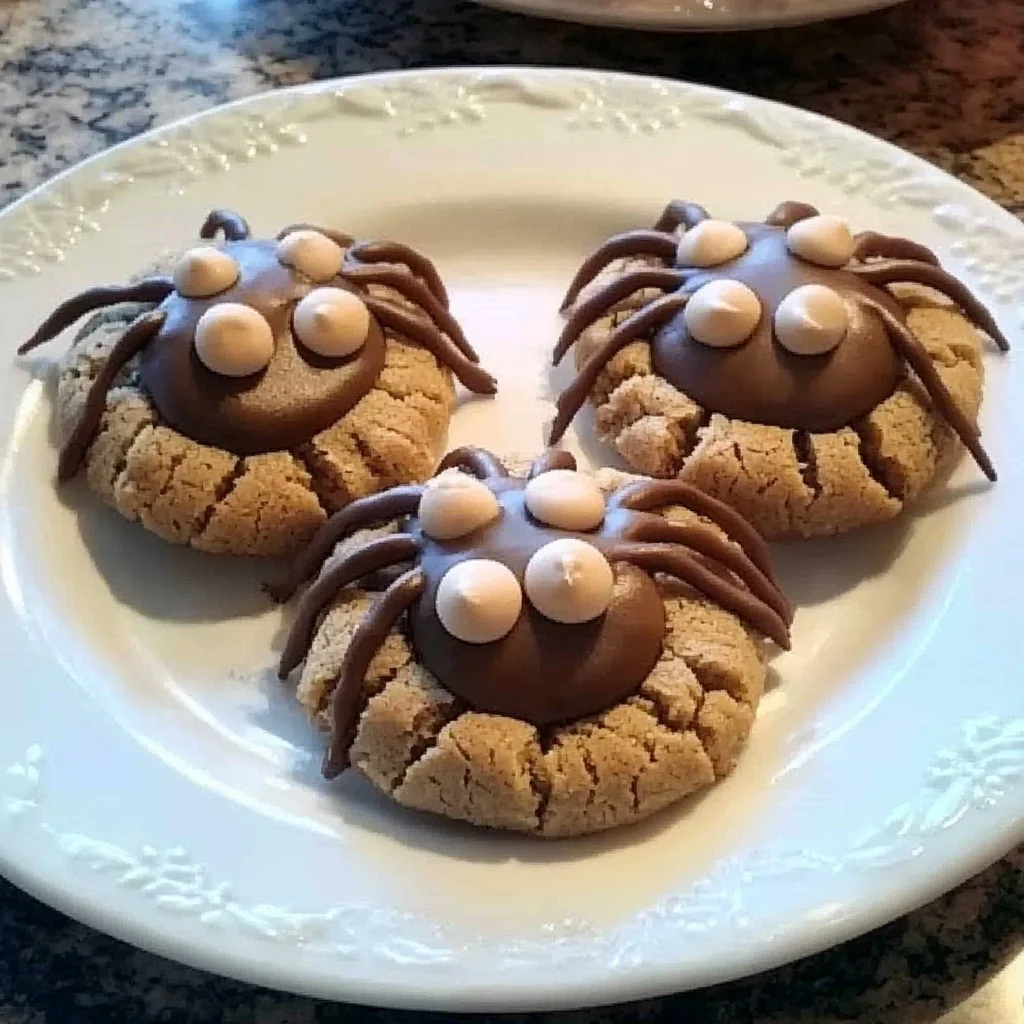
There are some treats that just scream “home” and “happy memories,” aren’t there? For me, that’s anything with peanut butter, especially when it’s in cookie form. And when you add a little spooky fun, well, that’s just pure magic! These Peanut Butter Spider Cookies are an absolute delight. They’re incredibly easy to whip up, making them perfect for a last-minute Halloween bake or just a fun weekend project with the family. Plus, who can resist a cookie that looks this adorable?
Why You’ll Love Peanut Butter Spider Cookies
- Fast: These come together in a flash, perfect for when you need a sweet treat in a hurry.
- Easy: Even if you’re new to baking, you’ll find these simple to make.
- Giftable: Package them up and share the spooky cheer with friends and neighbors.
- Crowd-pleasing: Everyone loves a classic peanut butter cookie, and the spider theme is a huge hit!
Ingredients
Gathering your ingredients is the first step to cookie success! Here’s what you’ll need:
- ½ cup shortening: This helps make the cookies tender and soft.
- ½ cup peanut butter: Creamy or crunchy, your choice! I personally love creamy for this recipe.
- ½ cup packed brown sugar: For that wonderful caramel-like sweetness.
- ½ cup white sugar: To balance out the brown sugar and add sweetness.
- 1 large egg, beaten: Binds everything together perfectly.
- 2 tablespoons milk: Just a little to get the dough to the right consistency.
- 1 teaspoon vanilla extract: For that classic, comforting cookie flavor.
- 1 ¾ cups all-purpose flour: The base of our delicious cookies.
- 1 teaspoon baking soda: This is what makes our cookies rise beautifully.
- ½ teaspoon salt: To enhance all those lovely flavors.
- ¼ cup white sugar, for rolling: This gives them a lovely sugary coating.
- 24 chocolate candy spheres with smooth chocolate filling, refrigerated: These are our spider bodies! Make sure they’re chilled so they hold their shape.
- 48 decorative candy eyeballs: For those googly-eyed spider faces!
- ½ cup prepared chocolate frosting: To stick on the eyes and create the spider legs.
How to Make Peanut Butter Spider Cookies
Let’s get baking! This is where the fun really begins. Follow these simple steps, and you’ll have spooky, delicious cookies in no time.
Step 1: Prep Your Oven and Baking Sheets
First things first, preheat your oven to 375°F (190°C). While that’s heating up, grab your baking sheets and line them with parchment paper. This is a little trick I learned that prevents cookies from sticking and makes cleanup a breeze!
Step 2: Cream the Peanut Butter Mixture
In a large bowl, get ready to mix. Beat together the shortening, peanut butter, brown sugar, and ½ cup of white sugar until everything is wonderfully smooth and creamy. Then, beat in the egg until it’s fully incorporated. Give it a stir to mix in the milk and vanilla extract until you have a smooth, dreamy batter.
Step 3: Combine the Dry Ingredients and Form the Dough
In a separate, small bowl, whisk together your flour, baking soda, and salt. Now, gently add this dry mixture to your peanut butter creaminess. Stir everything together until a lovely dough forms. It should be just right for rolling into balls. You’ll want to divide this dough into 48 small balls.
Step 4: Roll and Arrange
Grab a shallow bowl and pour in the ¼ cup of white sugar. Take each little dough ball and roll it around in the sugar until it’s nicely coated. Arrange these sugared balls onto your prepared baking sheets, leaving about 2 inches between each one so they have room to spread a little while baking.
Step 5: Bake and Create a Dimple
Pop those baking sheets into your preheated oven and bake for about 10 to 12 minutes, or until they’re a beautiful golden brown. As soon as they come out of the oven, while they’re still warm and soft, use the blunt end of a wooden spoon to quickly press a gentle dimple into the center of each cookie. Let them cool on the baking sheets for about 10 minutes before carefully transferring them to a wire rack to cool completely. Patience here is key for perfect cookie structure!
Step 6: Add the Spider Bodies
Now for the spider parts! Take your chilled chocolate candy spheres and carefully cut each one in half. You want to create two little dome shapes from each sphere. Place one of these rounded chocolate halves right on top of each cooled cookie, with the rounded side facing up. This is going to be the spider’s head and body.
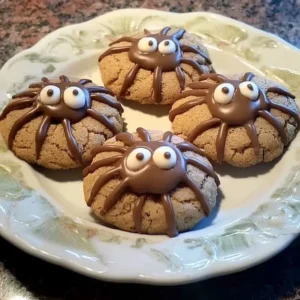
Step 7: Decorate Your Spiders!
It’s time to bring our spiders to life! Spoon your prepared chocolate frosting into a piping bag fitted with a small round tip, or if you don’t have one, a plastic freezer bag with a tiny corner snipped off works great. Dab a little frosting onto the back of each candy eyeball and carefully attach two onto the chocolate hemisphere to make the eyes. For the legs, pipe four thin lines of frosting on each side of the chocolate hemisphere, letting them extend a bit onto the cookie itself. These will look just like little spider legs!
Step 8: Let Them Set
All that’s left is to let your delicious spider creations sit at room temperature for about 30 minutes. This allows the frosting to harden nicely. Once they’re ready, store your amazing Peanut Butter Spider Cookies in an airtight container, and enjoy their spooky charm!
Substitutions & Additions
Feel free to get creative with these cookies! If you’re looking for something a little different, here are some ideas:
- Peanut Butter Swap: Don’t have peanut butter? Almond butter or cashew butter would be delicious.
- Chocolate Spheres: If you can’t find chocolate spheres, you could use chocolate chips or even small chocolate candies for the spider body.
- Legs and Eyes: You could use melted chocolate to pipe the legs and attach the eyeballs if you prefer. Black licorice laces cut into small pieces could also make fun spider legs!
- Extra Spooky Fun: For an even spookier look, you could dust the cookies with a little black edible glitter after frosting.
- For the Cookie Dough: If you’re looking for more cookie inspiration, you might enjoy my recipe for easy chocolate chip pumpkin cookies, which also has a wonderfully soft texture.
Tips for Success
A few little tips can make your cookie-making journey even smoother:
- Don’t Overmix: Overmixing your dough can lead to tough cookies. Mix just until the ingredients are combined.
- Chilled Candy Spheres: Make sure your chocolate candy spheres are nicely chilled before you start decorating. This helps them hold their shape when you place them on the warm cookies.
- Room Temperature Ingredients: For the creamiest batter, ensure your shortening and egg are at room temperature.
- Parchment Paper is Your Friend: Seriously, it makes life so much easier!
- Cool Completely: It’s really important to let the cookies cool completely before adding the chocolate spider bodies and frosting. This prevents everything from melting or sliding off. For more simple baking ideas, check out my easy sugar cookie lemonade crumble recipe!
How to Store Peanut Butter Spider Cookies
Once your spooky spiders have fully cooled and their frosting has set, you’ll want to store them properly to keep them fresh and delicious. Place them in an airtight container at room temperature. They should stay delightful for about 3 to 4 days.
FAQs
Here are some quick answers to common questions:
- Can I make these cookies ahead of time? Yes! You can bake the peanut butter cookies and let them cool completely a day or two in advance. Then, just add the chocolate spider bodies and frosting when you’re ready to serve or gift them.
- Can I freeze these cookies? You can freeze the plain peanut butter cookies before decorating. Once they’ve cooled completely, wrap them well in plastic wrap and then place them in a freezer-safe bag or container for up to 3 months. Thaw them at room temperature before decorating.
- What if I don’t have shortening? You can use unsalted butter as a substitute, but the texture of the cookie might be slightly different. You may need to adjust the baking time slightly.
Follow us on Pinterest for more delicious recipes and baking inspiration!
Spooky Cute Peanut Butter Spider Cookies
Equipment
- large bowl
- Small bowl
- Baking sheets
- parchment paper
- whisk
- Wooden Spoon
- Wire rack
- Piping Bag or Plastic Freezer Bag
Ingredients
For the Peanut Butter Cookies
- 0.5 cup shortening
- 0.5 cup peanut butter creamy or crunchy
- 0.5 cup packed brown sugar
- 0.5 cup white sugar
- 1 large egg beaten
- 2 tbsp milk
- 1 tsp vanilla extract
- 1.75 cups all-purpose flour
- 1 tsp baking soda
- 0.5 tsp salt
- 0.25 cup white sugar for rolling
For Decoration
- 24 chocolate candy spheres with smooth chocolate filling, refrigerated, cut in half
- 48 decorative candy eyeballs
- 0.5 cup prepared chocolate frosting
Instructions
- Step 1: Preheat your oven to 375°F (190°C). Line baking sheets with parchment paper.
- Step 2: In a large bowl, beat together shortening, peanut butter, brown sugar, and ½ cup white sugar until smooth and creamy. Beat in the egg until fully incorporated. Stir in milk and vanilla extract.
- Step 3: In a separate small bowl, whisk together flour, baking soda, and salt. Gently add this dry mixture to the peanut butter mixture and stir until a dough forms. Divide the dough into 48 small balls.
- Step 4: Roll each dough ball in the ¼ cup of white sugar until coated. Arrange on prepared baking sheets, leaving 2 inches between cookies.
- Step 5: Bake for 10-12 minutes, or until golden brown. While warm, press a dimple into the center of each cookie with the blunt end of a wooden spoon. Let cool on baking sheets for 10 minutes, then transfer to a wire rack to cool completely.
- Step 6: Cut the chilled chocolate candy spheres in half. Place one rounded half on top of each cooled cookie to form the spider’s head and body.
- Step 7: Spoon chocolate frosting into a piping bag. Dab frosting onto the back of each candy eyeball and attach two onto the chocolate hemisphere for eyes. Pipe four thin lines of frosting on each side of the chocolate hemisphere for spider legs.
- Step 8: Let the cookies sit at room temperature for 30 minutes for the frosting to set. Store in an airtight container.